
Antique Autumn Hand-Tie
Antique Hydrangeas and Burgundy Dahlias combine for an amazing color palette. In this Flower School How-To Video Leanne creates a stunning foam-free hand-tied design ready to drop into an elegant vase. The bouquet is finished with roses, mini-carnations, blackberries and smokebush foliage. A collar of draping eucalyptus foliage completes this awesome design. Enjoy

Video Transcription
Welcome to the Flower School .com video library. I'm Leanne Kesler, Director of the Floral Design Institute. And today, I'm here to share with you an antique autumn hand tie, perfect for the season.
People often ask me, where do you get your inspiration? Sometimes, it's from a flower, maybe a specific bloom. Other times, it's from a container that starts the color palette, that then leads to the blooms. This time, it was the container, with this muted blue-gray, almost green, and then the gold. But it's wonderful for the different varieties of eucalyptus that are available to us now. And then, as I was thinking about autumn, first on my mind were the amazing dahlias, their great big faces. And you can see the colors all work well. Then antique hydrangeas. Blending the two, that burgundy to the blue-green, then texture for interest.
When you're working with a dramatic bloom, like the dahlia. It's so big and their stems kind of large too. Oftentimes, it's best to go ahead and begin with those, thinking about shadowing one right below the other, and tucking to them together in your hands, adjusting until you find how their stems line up the best. You can just move them around. That's a beauty of a hand tie. You can adjust as you go. Then when you got it where you want it, start adding in the additional blooms. Maybe it's one of the hydrangeas, bringing it in at an angle. Maybe you want the smoke bush, adding it in at an angle. And then turning. A rose, going to a little brighter, maybe two, because they're smaller, another smoke bush, and giving it a turn. And everything I do, I angle as I place it in my hand. So maybe, yet another of the hydrangea angled and a mini carnation, maybe another, then turning, thinking about what I previously used, the smoke bush. Pulling the dahlia up, it fell down a little bit. But that again is the beauty, you just slide it right back up. Coming in with the roses again, maybe another of the hydrangea, making sure that the color is spread through-out. Pulling and turning, and just looking at how it's all laying together. Adjusting a bit, to get the stems where you want them to be. And you can move them up and down all you want to, but you can't adjust the angle. You always place it in the same direction with the head to the side, stem coming out, and then turn.
When you look at it from the face, you can see hydrangea, hydrangea, hydrangea and a hole. So coming back, filling in that hole. I need a little more smoke bush, maybe another rose or two, and then turning and thinking about texture, adding interest. Looking again for balance, maybe another mini carnation, there's smoke bush over there, maybe yet another mini carnation, grouping them. Then these wonderful ornamental blackberries, having them come out to the side. Removing any broken bits, then turning. Again, adjusting blooms, that they start to slide, just give them a little tug, put them back where their faces show well, and turning. Balancing out the colors and the placement. Double checking that you've got good coverage from all dimensions. Sometimes, if you stand and look in a mirror, gives you a little better control of the visual. Then lastly, bringing in the draping, the soft eucalyptus and the spiral eucalyptus. Turning and you can see, it adds a softness to the finished bouquet, just by bringing that movement, that trails and drapes. Then when you're done, stand in front of the mirror one more time, looking at it from all sides and see what should be adjusted.
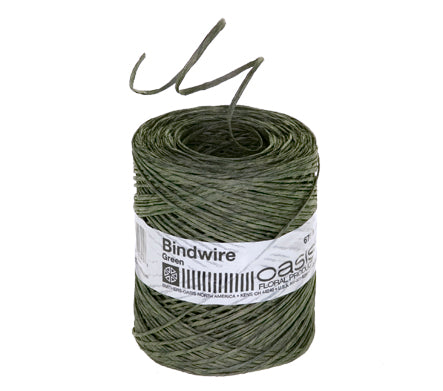
When you're happy with the placement and the balance, using bind wire or raffia or zip tie. If you've been to flower school, you know there's lots of different ways to do it. Hold it with one finger, then hold it upside down, and wrap above your hands snugly. Because this is what holds it all together. Go around two or three times. It would be one more, making sure it's nice and tight. Then twist those two ends together, securing the bouquet. Then I find it easiest to set the vase at the table, hold the bouquet at the side of the table. And that way you can see how long to cut the stems, so that they go to the bottom of the base. But the bouquet nestles at the lip.
As it should, the spiral hand tie will stand on its own. Set it on the table, just so that you could see no hands. I'm going to go ahead and just set it into the vase, so that it has water. I don't want it to dry out. Tightening up the stems and just sliding it right down. The recipe for hydrangea and two of the dahlia, 12 roses, and then I used a full bunch of smoke bush, full bunch of mini carnations, and a full bunch of blackberries. Then I had just a few stems each of seeded eucalyptus and spiral eucalyptus to complete the bouquet.
And the intense hues of the antique hydrangea and the dahlias blend so well, with the intense antique look of autumn. You'll find more creative inspiration at our website, Flower School .com. If you have questions, you can reach us through there or give us a call at 503-223-8089. Now, it's your turn. Pick your favorite colors, your favorite flowers, and create a hand tie bouquet. Be sure to take a picture, post it on social media, and hashtag Floral Design Institute. That way we all can see, what you do as you do something you love.


