Contemporary Bridal Bouquet
In this video Leanne reinvents the classic round carnation bridal bouquet. Contemporary and fabulous and accented with a beautiful spike of Phalaenopsis Orchids, this design is certainly not your grandmother’s bouquet. You will love the techniques that Leanne shares in this hand-tied bridal bouquet. Enjoy!
Welcome to the flowerschool.com video library. I'm Leanne Kesler, director of the Floral Design Institute, and today, I'm here to share with you a fabulous contemporary bridal bouquet, focused on carnations and phalaenopsis orchids.
To begin, you just want to make sure that all your flowers are totally devoid of foliage. Pull everything off, so it's nice, clean, clear stems, and if they're not totally open, you can manipulate them, to get them to flesh out a little more fully. Then go ahead, put them back into a vase of water to hold until you're ready to work with them. The orchid, nothing to do but make sure that it's hydrated, and then ruscus, again, removing all the lower foliage so that all you have is the nice bare stems to work with.
The base of the bouquet is nothing more than a simple hand-tie done spiral style with the carnations. Now, the antique carnations, with their beautiful bicolor faces, are just amazing. There's so many great colors to choose from now, that carnations are back in style. I love, love, love this hue. Just gathering them in your hand, getting a cluster, making sure it's precise. That's the magic of this contemporary design, is its geometry is perfect. There's not ups and downs. It's just a nice, smooth surface. Then as you add a flower, just add the head to one side, stem to the other, give it a turn, head, turn. If they start to slip, pull them back up so that they keep that geometry going.
It's perfectly fine to add more than one at a time, as long as you make sure their heads still go with the flow. Give it a turn, making sure that it stays very, very round. If it starts looking oval, or lopsided, then you know you need to add flowers on the other side to balance it, and turning. As they slip, tug them back up. And you can see the colors. Now, that one broke off. If they break, just set it aside. The stem will fall out, because it's underneath the hand now. And I always save the broken ones, because you never know. You might need them, so don't throw them away, and just keep adding until you get the perfect spiral.
As you get your perfect circle, double-check, see if you need to add something anywhere, turning it in your hands, double-checking that it truly is a perfect mound, everything works. Watch out for the broken ones. Tucking, pulling, making sure, then once you feel like you've got it perfect, then coming back with the ruscus and doing the exact same thing right around the edges, filling it in. This gives a nice supporting collar so that it protects the stems of the carnations, adds a little bit of beauty, contrast color. Turning, and again, watching. If it tucks down, pull it back up so that you keep that symmetry going. Double-check that you've got solid placement all the way around. Do one last check on your carnations, tugging, one last check on your foliage. Make sure your back is totally covered, and then tie it off.
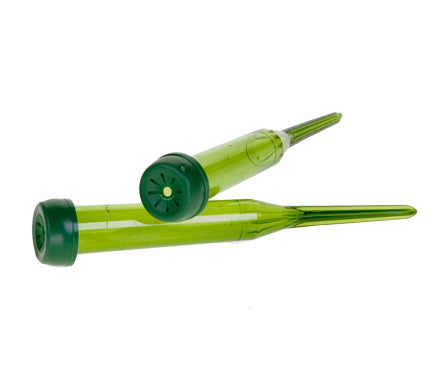
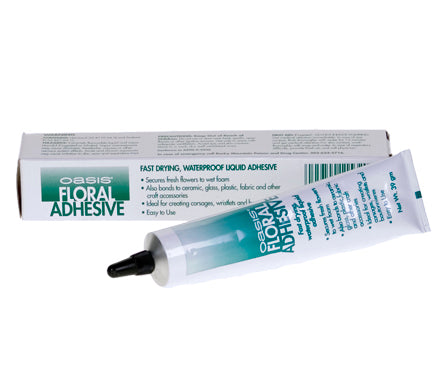
Once you have it tied off and the stems cut down, you can set it in a vase of water, to hold while you continue working, and also to hold until the wedding. For the orchid, cutting it and placing it into a water tube, so that it has a water source. So I just cut it down, place it down into the tube, nice and snug. There we go. Then to secure it in place, just a little bit of the Oasis floral adhesive, right on the side of the tube, so it will glue it directly to the carnation base.
Then, determining where it fits the best, just nudging these apart, sliding it down in, varying it inside, adjusting the faces, and then a little secret. If you've got a spot that doesn't seem perfect, taking one of your broken carnations. Give it a cut, a little bit of glue right onto the stem, and carnations are so long-lasting, it'll hold just fine. Just slide it in and fill any hole that may have appeared as you tucked in the orchid.
Just like with the carnation, phalaenopsis orchids are also very long-lasting, so if as you place it, you feel like you really need one more bloom, it just needs one more bloom to be perfect, you may have one that either was at the bottom or that didn't show, and just adding a bit of glue to the back and the stem, and go ahead and place it in. Play Mother Nature, and all of a sudden, then you have that one more orchid that you just had to have. Then, taking a bit of ribbon and tying it around the raffia tie to conceal all your mechanics, and you've got a perfect bouquet.
The perfect geometry, the round form, the accenting phalaenopsis orchids, but what's missing is dynamic line. So going one step further, just this tiny bit of passion vine and tucking that in to give movement, giving it a cut, and again, just gluing it into place, down into the body of the bouquet, and then winding it around, bringing it through, tucking it between the carnations, and letting it trail outward.
The simple carnation, done in a classic round hand-tie, but so fabulous for the contemporary bride. When you update it with orchids and passion vine, how fabulous is that? For more creative inspiration, check out the website, flower school .com. he website contains hundreds of floral design how-to videos, floral design classes, online floral classes and DIY Flowers. If you have questions, you can reach us through there or pick up the telephone, at 503-223-8089. And of course, I'd love to see what you create. Take a photo, post it on social media, and tag Floral Design Institute. That way, we all can see what you create as you do something you love.


