
Garden Rose Bridal Bouquet
In this how-to video Leanne demonstrates how to create a natural styled hand-tied bridal bouquet using fabulous Tiara Garden Roses from GardenRosesDirect.com. Bachelor buttons, nigella pods, Queen Anne’s lace and mini-phalaenopsis orchids compliment the roses. The finishing touch of soft textural lambs ear foliage completes this gorgeous on-trend bouquet. Enjoy!
Welcome to the Flower School .com video library. I'm Leanne Kesler, director of the Floral Design Institute and today I'm here to share with you a fabulous bridal bouquet featuring garden roses.
We went online to GardenRosesDirect.com and ordered the rose. It's grown at Alexandra Farms, it's called Tiara and it's an amazing bi-color, little bit of green, that smoky lavender, so on trend. That was the starting point. Then I wanted to take that luxury bloom and mix it with other softer textural materials. So I have some bachelor buttons, nigella pods, Queen Anne's lace, and then for even more luxury, some little tiny orchids. Foliages, Italian ruscus and lamb's ear will make this a lovely bouquet.
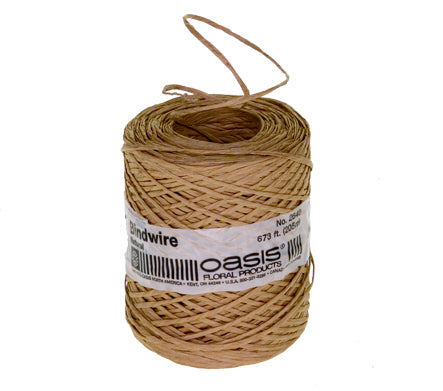
There are so many different mechanics you can use to create a bouquet. One of my favorites is to use a natural foliage armature. So starting with the Italian ruscus and just tying it in a knot upon itself. If you want to make sure it doesn't come loose using a small bit of bind wire, just a tiny piece, and twist, securing it and maybe taking another piece, and again, just knotting it around on itself, weaving and winding, you may or may not need another bit of bind wire. I'm going to just stop there. Then adding a tiny bit of the lamb's ear so I have that soft texture right in the center.
Once you have a beautiful nest, then you start with just adding your flowers, taking them one at a time, feeding them into your hand, a soft angle. Then turning, and again soft angle, every time turn and add with the angle head one direction, stem the other. You can go back, add in some of your textural flowers, feeding it with that same angle, turning, a few bachelor buttons. You can add more than one thing at a time if you'd like. Maybe another rose, turning. Some of the nigella, pulling it out, sitting it where I can see it. Tucking it in, each time turning, looking for anything broken and removing, adding in another of the beautiful roses, bit more of the nigella, maybe one more of the Queen Anne's lace. Then looking at it, standing at a mirror, double checking for balance and then add in blooms to make sure that you're balanced front to back and side to side.
As you're looking, you can always go back, add a few more of the same bloom to get a little more fullness. Letting it extend out. Turning, grouping, maybe you want several roses on this side. Coming in with the bachelor buttons. You can place them one at a time or gather them in your hands and place them in a cluster. The end result looks the same. That's really what makes you comfortable as you're working. If it falls down, pull it back up a little bit. Adding in more color and of course the fabulous roses. Then once again standing and looking in a mirror, checking for balance, add in and add color until you love it.
The final detail, the miniature phalaenopsis orchids. Longer pieces can come in at the side draping outward. Shorter, you can actually weave in through the center, finding the perfect little hole, feeding it down in and letting it stay a little taller over the bouquet. Then turning it, finding another spot to add in, feed it right into your fingers, giving it a turn and finishing it off on the opposite side.
A finishing collar of lamb's ear gives it nice softness, protects your flower stems. Just placing it in, turning, bringing that soft grey downward. We started with it in the center so you don't want to stop there. Bringing it on down and around, turning. Then checking it once more in the mirror to make sure everything is right where you want it to be. Then using just a bit of bind wire, securing it together, then cutting the stem short.
The beautiful bouquet is easy to make. Again, I started with roses from Garden Roses Direct, grown at Alexandra Farms. I had 12 of the Tiara roses. Then I had a small bunch of bachelor buttons, five stems of the mini phalaenopsis, about a half a bunch of the nigella pods, and then I used almost a whole bunch of lamb's ear, so I was working in bunches just to make it very cost effective and easy. Then five stems of the Queen Anne's lace, little bit of bind wire, and it's a gorgeous bouquet.
The moody purple of the Tiara Rose is sure to be a favorite. Care and handling is vitally important. We have a full video on care and handling of garden roses at Flower School .com. You'll find that and inspiration there. If you have questions, you can reach us there or pick up the telephone and give us a call at (503) 223-8089. Now I'd love to see what you create. Gather up garden roses, make your own bouquet, take a photo and post it on social media. Be sure to hashtag Floral Design Institute. That way we all can see what you do as you do something you love.


