
Dried & Fresh Wedding Bouquet
In this video how-to demonstration Leanne creates an amazing wedding bouquet combining fabulous fresh flowers and dried flowers all from FiftyFlowers.com. The crescent style hand-tied bouquet is built upon a chicken wire armature and features white protea, roses, anemones, dried and bleached flowers and enhanced with a collar of metallic copper and gold foliages. You will love this gorgeous bouquet. Enjoy!
Video Transcription
Welcome to the Flower School .com video library. I'm Leanne Kesler, director of the Floral Design Institute, and today I'm here to share with you at fabulous on-trend wedding bouquet combining both fresh and dried materials.
All of the flowers that I'm using today are from FiftyFlowers.com. I have so much fun sitting perusing the website, gathering my favorite things, then I took some creative liberties. I started with some great anemones, that blush, the deep black center and some protea for dramatic architectural form and then some golden mustard garden roses because they're grand. Then I decided I wanted to go on trend with tinted foliage, so I started with some seeded eucalyptus, but I didn't stop there. I painted it. Yes, air tinted it using gold and copper to give it that metallic look that's so popular right now for events and weddings. Then I went to the dried and preserved materials. The Italian ruscus preserved and bleached is grand, but lacquered copper, isn't that fun? You can get so many different color variations. Then I started with the French vanilla bouquet, comes pre-done with so many different items, lots of different textures, so many things to choose from. But what I'm going to do is take it apart and just use some of my favorite bits to enhance the design.
The base mechanics of the bouquet is a classic using floral netting to create an armature. I rolled it into a tube, secured it just by twisting the wires together and then I can manipulate it to get the exact form I want. I want the bouquet to be a long horizontal so I can leave it long, but then I want it to become more crescent, a little bit of a bend and I can just adjust getting the form exactly the way I wanted before I begin designing.
I start with a base of ruscus and eucalyptus that will support all the flowers, so taking pieces that I've prepared ahead of time, they've already been gilded, laying them out where I can usually reach them then weaving them through the armature. Taking a little bit of the ruscus and bringing it in, then bringing it back out through the center, repeating that with a second piece coming in from the opposite side and then bringing it back out through the armature. In doing so, I'm creating a handle for the bouquet and establishing the length of the design, I can adjust, bend it down a little more if I would like. Come in with the eucalyptus, feeding it through, bring it down into the handle, letting it drape and again. Then some of the fuller pieces you can actually just place underneath. You don't even have to put it into the armature, just enhance coming out through the sides and repeat that the opposite direction. Then adding more of the eucalyptus and as I'm working, thinking about side to side and front to back, keeping it narrow front to back, then long and skinny side to side.
Mechanics done, base form established, need to add the focal emphasis. The protea are perfect for that. So dramatic bringing them in, feeding it through, down into the bouquet, then carrying your eye across. One towards the front, one towards the center, finding the perfect spot to feed it in. Then a third, bring your eye all the way to the back side, cutting it down to fit, then dropping it into place because you want it to look good from the front and the back. Yes, most people will see it from the front side in the pictures, but the bride will be looking down on it and they could turn it. You want to make sure that it looks good, pulling your eye from front to back with a strong focal emphasis.
Once the focal emphasis is established, you want to carry on with the line, bring the flowers out to the sides, that's where the armature helps because you can feed it in and it forces it to stay right where you want it to be, drawing the eye outward. Bringing some into the front, then on out. Pulling it into the handle area, creating different layers and depth then coming in with the anemones. Their faces are so beautiful, the steam will be supported by the armature, fitting it in, bring it through, pulling it and facing, then repeat that on the opposite side.
Adding a little more texture with the dried materials makes this so on trend. Again, I started with the French vanilla bouquet but I took that apart so I could just pick out pieces that I want to use. Maybe some bleached teasel, setting that down in, finding the little perfect hole, maybe the buttons, aren't those delicate and beautiful coming out to the side. So many different things to choose from. Feeding it in, adding a little bit of texture and pulling your eye from front to back so that it goes all the way around.
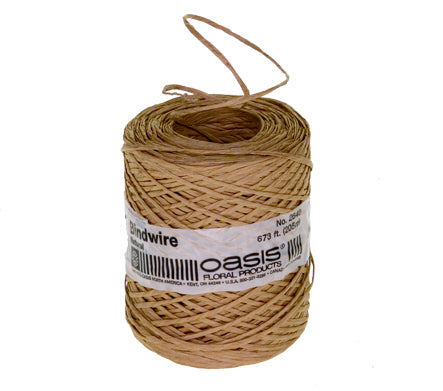
As a final detail, I want to make sure that all of my base mechanics are hidden and also protect the flower stems. So going back and adding a little more seeded eucalyptus, tucked up right underneath. That way it protects the stems, adds a little more fullness, tying it all together. Then using bind wire, just lashing it around my hand just above where I'm holding it and securing it so everything will stay in place.
The finished bouquet, all my favorite flowers from Fifty Flowers .com. I shopped, then I found and I gathered the base, the gilded Italian ruscus, preserved and bleached and then lacquered with copper and seeded eucalyptus with gold and copper, a bit of the French vanilla bouquet for the dry flowers, three protea, 10 golden mustard roses, and 10 fabulous anemones. It really doesn't take a lot to make something super wonderful.
Using the hand tie technique with an armature, you can cut the stems and set this in a vase of water and let it sit for a day or two refrigerated to hold until it's time for the ceremony. Then take it out, dry the stems, cut them to the right length and enhance with whichever ribbon you would like. Now you'll find more creative inspiration at our website, Flower School .com. If you have questions, you can reach us through there or pick up the telephone and give us a call at (503) 223-8089. Now it's your turn, design an armature, create a bouquet and be sure to take a photo, post it on social media and tag Floral Design Institute that way we all can see what you do as you do something you love.


