
Easter Bunny Arrangement
Floral Designs for Easter can be traditional or whimsical. In this Flower School How-To Video Demonstration Teacher Marisa Perring AIFD has chosen to create a fantastic whimsical design. You will be amazed as she shares her techniques for creating an Easter Bunny out of carnations. The finished design is "off-the-scale" cute. Enjoy!

Video Transcription
Hi there, and welcome to the Flower School .com video library. I'm teacher Marisa, one of your instructors here at the Floral Design Institute. And today, we're going to hip hop our way into designing a bunny, perfect for the Easter holiday.
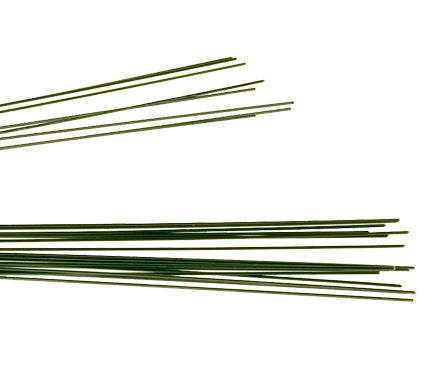
For the materials, I'm going to start off with a basket to keep it within the Easter theme. Then for the bunny, I have carnations, acetate ribbon, chenille stems, Oasis floral adhesive. Also, anything you'd like to use for the eyes. I chose buttons. For the nose, I use sisal that I'll show you later. A little poof ball for the tail. And lastly, a one and a half size ribbon for the bow.
To create the bunny face, let's start with the ears. I start with a number 16 acetate ribbon. I chose this pink color just for the inside of the ears. I thought that would be really cute. So, what we do is cut a strip, two of them because we have to make two ears. I cut about maybe six inches long, but you'll see the length when we use the chenille stems, which is going to be the outer part of the ear. So, a white chenille stem. All you do is just gather it together, then you're just going to do a twist here at the end. Then we're going to take our Oasis floral adhesive. Apply just enough glue so it adheres the ribbon. You don't want to use too much so it bleeds through the other side. Just going around, following the shape of the chenille stem, and then going directly on to the ribbon. Now, I already have two prepped, so you didn't have to wait for it to dry. But, what I'm going to do now is you're going to take your scissors and you're going to trim all the way around so it looks like this. And this was an accident. My ears ended up two different sizes. I think that's going to make it look really cute.
To create the face of the bunny, we're going to start with five carnations. I'm going to just grab the most open ones. If they're not open, just fluff them out a bit. Okay, so we have one, two, three, four, five. Okay. So really, what we're going to do, we're just going to create a round shape. You can actually just take them all together and just really adjust them so they create a rounded form just like that. Then, you're going to take your 22 gauge wire. I have a really long one. And then you're going to do a really long clutch wrap going here, going around, clutching as far down on the stems as you can. There's the base of our face. This is the fun part. Now, we have to add the eyes and the nose. I have two buttons. You can use whatever you'd like for the eyes and nose. I have sisal. I'm just going to tear this apart and this is going to be for the nose, the little pink nose of the bunny. I'm just going to go ahead and just swirl this into my palm of my hands. I just really like the texture of sisal. How cute is that? All right.
Okay. So now, let's actually place the ears in first because it will make it easier to place the eyes and the nose. Let's see, I'm going to start with the bigger ear on the left side. Taking my glue and just placing a little bit of dab of glue on one side of the chenille stem and then... Oops, and a little bit on the other side. And because the chenille stem has a little bit of a wire inside, it can just be pierced almost right into the carnation petals just like that. Okay. Then I'm going to place the other one on the other side because it makes it easier to place the eyes symmetrically. Okay. And then placing... Oh, the other one, the other side.
Now, for the eyes. Placing the eyes is crucial. Sometimes if they're too far apart, it looks funny. Too close together, they look funny. So, you have to get them just right, sometimes if you open up the petals and nestle them down inside. Then we will put another one on the other side. Then for the whiskers, the three chenille stems that we cut earlier. Just going to glue a little bit on one side. I'm going to do three on each side. You can do two on each side if you'd like, but I prefer three. One coming out the side here. And then lastly, going to place the nose right in the center.
The bunny face is done. How cute is that? For the base, I'm going to grab my basket. I'm actually going to cut off the handle just to make it a little bit contemporary, just a little bit. So just going to go ahead and snip those right off. Okay. Then, I'm going to use galax leaves to go around the outer perimeter just to break the line of the container a little bit. And then I'm going to use Israeli ruscus in pieces to almost create sort of like a hedge all the way around as well.
Now to add the bunny face and the bunny body, we are going to start with cutting this pretty short. So going back at the very beginning, when we clutch wrap, you want to make sure you go very long because the wire is holding all of the stems for inserting. I'm going to have to do it this way because it has to be the precise placement. All right. So going... Oh, okay. I'll turn it around here in a second. So going ahead and inserting. There you go. All right, I'm going to turn it back around because now we're going to start the body. About six carnations. And the trick here is we're going to have to make it almost like a dome, very rounded. And having the ruscus placed in first, it's going to make it look like our bunny is in the hedges of grass. Let me turn this back around again. And then you're going to want to place the first one lower than the body, just like that. And then adding more to round it out.
Then, let's just add a touch of spring with some spring flowers. How about some heather? Just give me a little bit of cut. And then also placing it a bit taller in the back just to give it some height. Maybe a shorter piece on the other side just to create a little bit of rhythm. And then some acacia, just to bring a little brightness down to the bottom. Lastly, these wonderful anemones which will unify with the little pink nose.
Now that we have our flowers, isn't it just so cute? It's just those little details. The fine tuning that you have to do. Sometimes, when you place the eyes, the carnation petals go over the eyes and sometimes the bunny can look angry. Don't be afraid to just go through and just pick with your fingernails so the eye shows. It doesn't look so angry. Then, a bunny has to have a tail so we're going to take our little bunny tail, add some floral adhesive here. And there you go.
For the recipe, I used 11 carnations for the bunny, two heather, two acacia, two beautiful anemones, 10 Israeli ruscus and 10 galax leaves.
A bunny would put a smile on anybody's face. For more creative inspiration, visit our website at Flower School .com. Now, it's your turn to do something you love.


