
Funeral Flower Arrangement
Sympathy work and memorial tributes are some of the most important designs that we create as professional florists. Understanding excellent floral mechanics and techniques is essential. In this flower school how-to video Leanne creates a beautiful floral wreath as she demonstrates proper mechanics and design techniques. Enjoy!

Video Transcription
Welcome to the Flower School .com video library. I'm Leanne Kesler, Director of the Floral Design Institute. And today, I'm going to share with you a contemporary take on a classic, an arrangement perfect for a funeral tribute.
The base is a 15-inch foam wreath. It's been pre-soaked with flower food, so it is ready to go to keep the flowers hydrated. You'll notice a taped grid all the way around. Using your waterproof tape, go through before you begin, tape completely. That will ensure that the foam doesn't shatter as you get so many blooms placed.
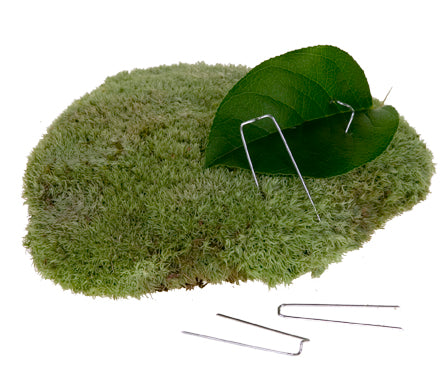
First is to cover your base mechanics with foliage. We're going to be using some aspidistra, because that covers it quickly and beautifully. Giving it a cut, then placing it into the foam on the horizontal, then just wrapping it around. Now, you can use a greening pin to secure it in place. But even better, just take your next leaf, give it a cut, then pierce straight through the first leaf into the foam, wrapping it around. Repeat that, and each time, just piercing a leaf, bringing it around, securing it either with a greening pan or with a previous leaf. Now, you can go back and do the interior, as well, thinking about how you're working around, being consistent. So, if I start here, I want to make sure that I'm also going the same direction. Coming in on the interior, bringing it around, adding another leaf, piercing through, wrapping. And then, one more, piercing, wrapping. And the last one, definitely a graining pen to hold it in place. Then once you have all the aspidistra, you can go back with additional foliage and add some depth. Some salal leaves, pierced directly in, letting them come out, adding dimension and fullness before you begin flowering.
Once you have the side filled in, you want to come back and fill in the top as well. You could continue with more of the salal leaves. You can also add a third foliage. I always like to use at least three. So, maybe some Myrtle cut down. Then I have yet another texture, another growth format. Placing that in. You can bring some down around the sides, too, for unity. You can see every time that I place a stem in the sides, it's helping to lock that aspidistra in place. There's no chance that that's going to come undone. You can even bring it up through the top, bring it this way, locking it, making sure that it's secure. And continue just placing your foliage until you have a base coverage that then creates a beautiful nest to support your flowers.
When I'm finished with the foliage, I still have mechanics showing. You don't want to totally worry about concealing everything, because you still have to fit the flowers in. You need room for their stems. You just want a nice lush base so that you're ready to move on. If you're going to use ribbon, now is the time. I got some double-sided satin. It's not wired. So it's going to be kind of a loopy droopy. To work with this rather than actually making bows, placing it with a pick machine and adding a pick. Now, if you don't have a pick machine, you could do a wired wood pick. But a pick machine is just a nice labor saving device to add a pick. Just go on down, gather it, pick it in. Repeat and just keep adding picks and ribbon. You can see how quick and easy it is, far faster than the wired pick. You can do it in multiple pieces, or you could just do one incredibly long string. That one I missed. I didn't clamp it quite tight enough. There we go. Maybe one more and then I'll start with another string. So just putting the end piece, then determining where you want it, because this will create horizontal movement through the design. Adding to the line of the arrangement, bring it in, up and over and weave it between the foliage, up to the side, back up and round and end. And then, start with another string, and repeat.
In the classic style, this would often be done with one flower, all red roses, all red carnations. In a more contemporary version, I'm mixing roses and spray roses in a variety of colors. I've got orange spray roses, light red and dark red spray roses. Then, in the standard roses, I've got Freedom for the red and High Magic for the bi-color orange. You want to cut them down, about a two to three-inch stem, depends on how full you want it to be. Once they're cut, begin placing flush to the foam. It's a basing technique. Tucked in, some down to the side, some up towards the top, grouping, so you get a little more interest, rather than just totally salt and pepper. So, maybe some High Magic then alternating to the Freedom, coming back with some of the spray roses, tucking them down low. You can see light red, dark red, and repeat that over and over and over again. You'll be amazed just how many flowers it takes to totally cover. It's always more than you think. So be prepared. This isn't an inexpensive arrangement.
As you work, oftentimes, the ribbon will get tucked down in. If that's the case, just reach in, pull it out a little bit, fluff it, so that it doesn't get buried and lost. Make sure that it does show nicely, weaving through, guiding your eye through, then adding contrast. Leucadendron is wonderful, and the deeper, darker red, giving it a cut, removing the lower leaves. Then, just tucking it in to add a little more interest to the finished design, bit by bit, making sure some comes all the way down to the base, some all the way to the top and then in the center.
As you finish, be sure to look at it from all sides, turn it and then add more. The Leucadendron is so perfect, as a unifier, a blending, a little bit of contrast, tucking it in. Check your ribbon. Make sure it's up. You can adjust it, looping it a little bit. Checking your flowers, making sure everything's covered. Now, the recipe. I know you want to know what's in here. I started with the foliage. I used 10 aspidistra leaves, about half a bunch of salal tips and then two stems of myrtle. The flowers, 12 of the High Magic roses, 12 of the Freedom roses. Then I used two bunches of spray roses, some orange, some light red and some dark red, but I didn't need all three bunches. So, I just used two. Then I had two bunches of leucadendron to finish it off and fill it in.
Sympathy work, memorial tributes. They're some of the most important things we do as floral designers. Knowing the professional mechanics is vitally important. If you want more creative, inspiration, more education, you'll find us on the website at Flower School .com. If you have questions, you can reach us through there or pick up the telephone at 503-223-8089. Now it's your turn. Gather flowers. Think about what would be a fabulous tribute. Design away. Practice. Make sure you know how to do it. Then take a picture and post it on social media. Tag Floral Design Institute. That way, we all can see what you do as you do something you love.


