
All About Garlands
The easiest way to add drama and flair to any wedding or event is through the use of fresh foliage garlands. In this video clip Leanne discuses the many uses for garlands as she demonstrates pre-made garland, layered garland and how to create your own custom garland using foliages from FiftyFlowers.com. She also demonstrates how to enhance garland and how to calculate the amount of foliages and the footage of garland needed for an event. Enjoy!
Video Transcription
Welcome to the Flower School.com video library. I'm Leanne Kesler, Director of the Floral Design Institute and today I'm here to share with you everything you need to know about garland. Creating, estimating, calculating, and I have a huge shout out and thank you to FiftyFlowers.com for providing all these grand foliages to work with.
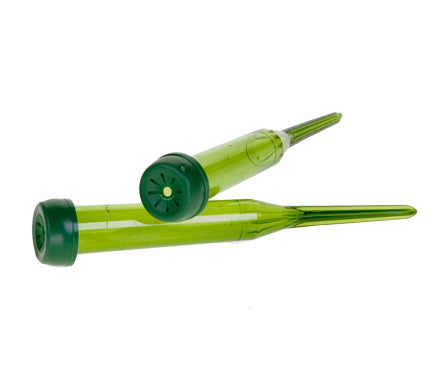
Now, when it comes to garland, it's really simple math. All you need is fabulous product, thank you Fifty Flowers, a tape measure, a calculator, and you're good to go. Yes, I said math, that evil word and told you had to have a calculator, but it really is that simple. Now, the very easiest is to use a pre-made garland, then all you need to do is calculate your measurements. How far across you want it to go, how far down the sides, add that together, and you know you need five feet of garland or 50 feet of garland. Then, you can go in and just order it. They have so many different varieties of pre-made. Check it out. It's on the website, FiftyFlowers.com, click on garland, and you'll see a whole assortment.
Now, this one is willow and bay leaf assorted and as it dries it's going to be absolutely stunning. The one thing, when you're doing pre-made garland and calculations, I always hear the question, what if I want it to scallop and have curvature. The trick there is you do one side plus one side. Maybe it's eight feet tall, so you've got 16 feet, and then when you're doing the width, to get that draping it's one and a half times. If it's eight-foot-wide, you go eight times 1.5, have 12 feet, add that to your sides and you need a total of 28 feet.
The second easiest technique for garlanding is to do layers. This works very, very well when you're doing a tabletop. It doesn't hang as well, but doing a tabletop it's perfect. I buy foliage by the case, so this was a case of plumosa, and then measure. You can double check because it's consistent throughout the year, but you measure your bunch, allow for overlap, and then calculate how many feet you need in total. In layering, you simply take the bunch out of the box, sit it on the table, take another bunch out of the box, overlap covering the end, and then again and again for the full length of the table. Super-fast and super fabulous.
The third garland technique is handmade custom, and it is fabulous. So beautiful, so lush. To do this and do the calculations, first step is to choose your varieties. For this demonstration, I use the Eucalyptus Wedding Assortment. Gives me a nice variety of textures and colors. In another demonstration, I'll be using the Tropical Wedding Assortment. It makes beautiful garland as well. Then, once you have your varieties, you want to think about the thickness. Do you want it to be a delicate garland, or do you want it to be full and lush, or possibly something in between?
Now, when you're doing that calculation, the easiest thing to think about, again, is the bunches. If you have 10 bunches, are you going to use a quarter of a bunch per foot? That's what I did on this one. This is one quarter of a bunch per foot of garland. Then, if you want it a little fuller, you might do half a bunch. This was one half bunch. Now, it's assorted bunches, but I divided it up into half a bunch per foot or if you need it very full and lush, maybe you're going to calculate one full bunch per foot. That makes it easy. You just measure your length, then choose. Is it one bunch per foot, half a bunch per foot, or a quarter of a bunch per foot? Then, order the appropriate bunches.
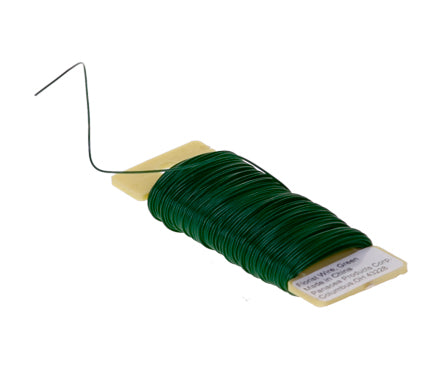
To create a custom garland, you want to bring in your foliages, whichever varieties you want, and then lay them out. Then, I break them down sometimes. Maybe I don't want it to be quite so long on the stem, but they all need to be approximately the same size. Not exactly, but I broke down the myrtle, the pittosporum. Isn't that beautiful? So many great things in this assortment. Again, this is the Tropical Wedding Assortment. It includes the fatsia leaves. Oh, I love those. Then, you need paddle wire. That's what we use for assembly is the paddle wire. It's just an endless spool of wire. To make sure that the whole thing stays together and doesn't stretch out or fall apart, you need an inner cord or roping and the cord or roping should be however long you want your garland. If you're doing 15 feet, you would have a 15-foot rope. Now, I'm just doing a sample, so I have a small segment.
Begin by attaching your paddle wire directly to the rope, just twisting it around and knotting it securely. Then, gathering your materials. Love the fatsia gives me a nice, beautiful base, clustering it in your hand and as you work, you want to make sure your bunches stay the same always. About the same size. Doesn't have to be the exact same materials in each one, but you want your bunches' size to be consistent because that will give you a consistent garland. A little bit of the leucadendron, then laying that right up against the rope, the rope just goes down the side, and then wrapping very snugly. You want to make sure it's nice and tight because it's going to dehydrate as it starts to dry and if it dehydrates, it will loosen, so you want it very tight. Then, the professional tip, periodically take it and pull it back through on itself causing a knot. That way if you ever break the wire, it won't just fall apart. Then, repeat that.
Go back, gather things, keeping the sizes about the same, same materials. Placing it overlapped, so that you don't see where the wire is. Maybe adding in a fatsia leaf in the back. Then, once again with your wire, wrapping with the rope staying right behind, wrapping, and repeat that over and over and over down the end. You can see my branches here are varying between 12 and 15 inches long, which gives me a nice, full garland. You can also use more shortened pieces. These were about eight inches, where I just shortened them, so I had very dense, a little more compact garland. Either way, absolutely beautiful.
One more tip. As I do my calculations, and I run into it and I go okay, I need 12 bunches to create this garland that I want, I always add in a bit of a cushion. I like to work with a 10% cushion because bunches will vary a little bit depending on the time of year and what farm it comes from and your personal choice. Do you want to not use that piece because it has a little bug bite? Well, then, you don't have to because you've calculated in a little cushion. As you do your order, add about 10% just to be safe.
No matter which garland you choose, the layering, the custom made, or the pre-made, you can always go back and enhance. With the layering, going back and adding some andromeda, the lily of the valley bush, and just layering that down in, brightening, enhancing. Letting it drape through. Again, you're just placing it in, shortening it a little bit, bringing it over, draping. There's another back there. You can see it brightens it so quickly.
With the custom made, going back, adding in curly willow, getting that really wild, natural look. You can just feed it down in. The weave is so dense you can just take individual pieces, feed them in, and they'll stay put. It won't fall out. With the garland that's pre-made, maybe even going back and adding fresh flowers. Just added the rose into a water tube and then placing it right into the weave, tucking it in tightly so it doesn't fall out. If you have any concerns, you could always glue it in place, but I find the weave is so tight oftentimes you can just place it and it will stay put.
In a quick summary, you need a tape measure, you need to know how many feet you're going to cover. Then, you need a calculator so that you can figure out how many bunches per foot it's going to take. Then, you need fabulous product, so again, thank you FiftyFlowers.com for providing all of this. It was such a joy to work with.
For more creative inspiration, check out the website. You'll find us at Flower School.com. Go to the resources library, you'll love it. The website contains hundreds of floral design how-to videos, floral design classes, online floral classes and DIY Flowers.
If you've got questions trying to find some of these things, you can reach us through the website or pick up the telephone and give us a call at 503-223-8089. Then, I love to see what you create. As you do your garlands, take a picture, send it to my personal email, or better yet, post it on social media and tag Floral Design Institute, so we all can see because now, it's your turn. You know how to do professional garlands. What are you going to create as you do something you love?


