
Bespoke Bridal Bouquet
In this video clip Leanne shares an on-trend bridal bouquet in the Bespoke Garden Style using a floral netting armature. Using gorgeous flowers from FiftyFlowers.com Leanne demonstrates the step-by-step creation of this luxurious bouquet. As she creates the bouquet she emphasizes proper mechanics and the elements and principles of good design. Enjoy!
Welcome to the flower school .com video library. I'm Leanne Kesler, director of the Floral Design Institute, and today I want to share with you an on-trend bridal bouquet in the bespoke style with floral netting. And the flowers, all fabulous, all from fiftyflowers.com.
As you can see, I had a lot of fun as I was shopping. They make it so easy with their choosing by color. I started with blush, on trend, and found this fabulous astilbe. Now, that's going to be super popular due to the royal wedding. Started there, and then just started playing. Moved over to light pink and got lisianthus and these beautiful secret garden roses. That color is so grand, so soft, so blush.
Then I wanted to update going on trend with the addition of that burgundy, or it could be called Marsala or cranberry. I just slid across the color bar and found these amazing dahlias. They are spectacular, fabulous quality. Astrantia, also going to be popular because of the royal wedding.
Then thinking about roses and garden flowers, on-trend what we do, but now adding in the tropicals is becoming so popular. So I went ahead and kept shopping. Found some James Storie orchids for a soft, delicate look, nice line and movement. Ti leaves. Look at that color. It will be stunning with the design. Then lastly, some cymbidium orchids. This spike has got to be the best I have ever seen in my life.
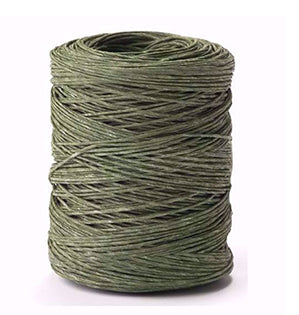
Today's bouquets are becoming more flower-centric. If you've always worked with a foliage base, it can be a little tricky. How do you create a design focused on flowers, have control, and still hide your mechanics? Floral netting is the answer. Just takes a small piece. Roll it around creating an armature. You can do different sizes depending on how big you want the bouquet to be. You just sew the ends together by twisting them and creating a beautiful armature that will support all the flowers and hold them in place.
As I begin, I think about the form of the design and how the lines will be placed. The James Storie orchids are perfect for that because they can come right in and start that horizontal movement. You can see the armature holds it in place. Bringing in another coming off the other side. Thinking about the scale of the design. You want it to be relatively large because that's sort of the trend, but not so large that the bride disappears. Stems all coming down to the side. Coming back in, finding the perfect hole, and weaving it across and down. Feeding it in, and then you can pull it from the bottom.
With the dahlias, they have that beautiful horizontal head that allows you extend outward and have the head still looking upward. Bringing that in. Again, following through with the same lines, stems all gathered in my hands. Twisting it so that the face stays upward. Bringing in another. They'll shift on you, but don't worry about it because by the time you get everything in place, it will hold securely.
Once you've established your line and your scale, you want to add emphasis, the main impact, right in the center of the design. That's where the secret garden roses are fabulous. Removing their foliage, and then feeding it down through. Keeping it nice and low. Repeating. These already have the thorns off, and it's not a super thorny variety, which that makes me so happy. Feeding it in and coming back with some of the astilbe for some soft texture. Just dropping it in, and you can see how each stem helps to support the preceding stem.
As you continue, you can add flowers in without going through the mesh. They can actually go underneath and give you a little movement at the bottom. Continuing on with a little bit more of the astilbe to bring in that softening. Then tucking in contrasting colors to get in texture and variation. Maybe bringing in more of the dahlias coming out to the opposite side. Again, working on that horizontal movement. Finding the perfect little hole. Just kind of twist. You can slide it into your hands.
Coming back with the astrantia. That blends the colors from the deep, deep cranberry to the soft pink. It's a nice movement. Twisting things back around, determining where you want it. Maybe one more of the James Storie. Adding more impact on this side, and then coming back with more texture. Again, just coming in underneath, filling in.
As I finish, I want to think about movement, some things come forward, some things to the back, and concealing all my mechanics because right now you can still see the floral netting. You don't want to see any of that. You want that totally hidden. We want a little more dimension, so maybe bringing in another rose, coming a little more forward, pulling depth. Adding in a little bit more of the astilbe coming out to the side. Maybe another, angling it a bit. Adding in more texture from the astrantia.
You can see I'm focusing everything so that it radiates from a central binding point creating strong emphasis. The line, the form, all of the elements and principles that you're supposed to have in a design, but done in this more up-to-date, on-trend, bespoke style. You can even go back, add in some of the dahlia buds. We don't want the leaves. Remove those. Let them come out to side creating even more line and movement. Tucking it in. Everything just tucks into your fingers. Holding in place, some through the mesh, some underneath the mesh.
Then to cover all the mechanics at the end, coming back with your ti leaves and tucking them in and clustering it tightly so that it will conceal everything underneath. You can even take it, place it in, and then pull it back on itself creating beauty from the top and from the bottom so that the color shows so well. Adding that depth of color at the bottom to enhance the design.
When you get it to this point, and you're pretty happy with it, stand and look in the mirror. See what else needs to be adjusted. Maybe I need a little more burgundy on this side, some weight to balance off. Tucking it low, so again, it adds depth to the design. Then I have so much light, dark, dark, maybe bringing in a little bit of the lisianthus out to the side to lighten the edges. Bringing it out even a little bit to the front, letting the buds go. It adds so much interest. Then going back, maybe adding another leaf or two. Then to secure it all in place, using the bind wire. Just taking off a length, clip it, and then wrap above your hand, going around two or three times. Then twist in place.
The finished bouquet is lovely. It looks good from the front and from the back. The mechanics are concealed. You don't see any of the floral netting. I cut the stems down. I'm just going to set it in water. You can do this days before the wedding, and just set it in water and put it in a flower cooler.
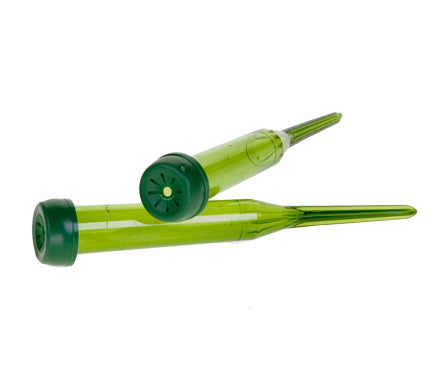
But I want to add one more bit of fun. We talked about the cymbidium orchids. Now, obviously this spike is far too big for this bouquet, but the blooms will be such a wonderful addition. Just taking ... Start at the bottom. That way the top stays beautiful, and pull off individual blooms. Then using your knife, give it a nice cut. Set it into the tube just like so. I already have water in here. I always give a cut to the lid so that it's not too tight. If it's too tight, it's almost like a tourniquet. Flowers won't last as well. Then the beauty of these, they're going to last forever and ever, it seems like, weeks tubed like this because they're slow water-drinkers.
They can just be set right down into the bouquet using a little bit of your Oasis Floral Adhesive. Just a bit of glue on the tube, and then determine where you want it. Again, remembering the focal emphasis, you could bring some down low, some up a little higher. I'm going to start right in here, feeding it in. I can reflex the petals. The glue will just bond to the other stems, so it's not going to fall out. It's nice and secure. You don't have to worry at all. Then remembering orchids have faces, and orchids are social creatures. They like to talk to each other, so facing their faces so that they're looking at each other. Finding another little hole in here, and adding it in, finding the perfect spot. There we go. Again, reflexing, and then adding additional until you love it.
A huge thank you to fiftyflowers.com. These flowers were amazing. The dahlias all came in perfect. The cymbidiums, so huge and dramatic. It was a delight to create this bouquet. Now if you need more creative inspiration, check out the website flower school .com. The website contains hundreds of floral design how-to videos, floral design classes, online floral classes and DIY Flowers. Be sure to look at fiftyflowers.com as well and see their purchase by color. It's a great tool when you're ordering your flowers. If you have questions, you can reach us through the website, or pick up the telephone and give me a call at 503-223-8089. Now it's your turn. I'd love to see what you create. Make a bouquet, post it on social media, and tag Floral Design Institute so we all can see. Have fun, and do something you love.


