Casual Winter Hand-Tied Bouquet
The cold winter days following the holidays can be depressing. We need brightness and beauty to lift our spirits and brighten these days. Beautiful fabulous flowers are proven to cheer us and improve our mood. In this Flower School How-To Video Leanne demonstrates a gorgeous hand-tied bouquet perfect for you and perfect to give to a friend. Enjoy!
Video Transcription
Welcome to the Flower School .com video library. I'm Leanne Kesler, director of the Floral Design Institute, and today I'm here to share with you a casual hand tie perfect for everyday gifting.
When doing a casual bouquet, it's wonderful to gather a variety of materials, rather than doing a dozen of one item. Do some of this, some of that and use interesting foliages. For mine, I'm going to do a lot of bay leaf. It gives a little bit of fragrance and a different look. I'm actually going to add in some magnolia branches to make it looser. Then flower wise, maybe some dry, maybe fresh, but a little bit of this and that. I've got hydrangeas, tulips, chrysanthemums, dianthus, larkspur, so many fabulous blooms that will mix and match for casual beauty.
As I begin the bouquet, I lay things out, make sure that they're totally prepared and ready to go. So the hypericum, I've removed all of the leaves. Hydrangea, just left the upper foliage. That way, as I add it in my hand, I don't have to fuss, and I lay things out and I start. Maybe with a bit of the bay leaf, maybe some of the larkspur, letting it come up nice and tall, little more bay leaf, creating a nest that will begin the bouquet. Then one bloom at a time or clustering, really depends on what you like. Add it into your hand, angled a bit, then turn it, maybe add in the branch, getting that extension started outward, then turn it, bringing in a chrysanthemum, and a second one terraced underneath. Then turning, maybe coming back with another of the larkspur. But you can see, everything I add into my hand, I can go in the same direction. And then turning just a little bit and not worrying about precision of placement at this point, because I want it to end up being more casual, little more carefree. Spray rose, turning, pick off that bad petal, we don't need that in there. Maybe a bit of the hypericum berry, turning. The dianthus, and a second one, and turning. A little more foliage. You can see everything just starts nesting together, filling in. If you want limonium for a softness, adding it in, maybe another rose. Turning. And then gather a few more blooms and keep adding.
As you work and you turn the bouquet, pay attention to where you grouped things originally, maybe group more to give even more impact. So adding in a bit more of the hypericum and then thinking about how stems flow. So I have a calla lily, maybe bringing the calla so it comes out with the branch, and then turn it. Bringing in some tulips that will drape nicely with that as well. Be a little careful because they'll continue to grow. So tucking them a little lower so that as they grow, they come outward, protecting them with a hydrangea. And then turning. Looking at other blooms, maybe another of the chrysanthemum, grouping it again. The dianthus, then enhancing. Then a bit more of the limonium and even a little more of bay leaf.
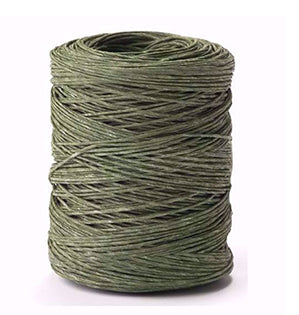
For the last stems, it can help to stand in front of a mirror. That where you can see what it looks like. Maybe you need a bit more flower over on this side. Maybe you need a little more filler. Maybe you want some more hypericum that pulls that color in. Sit and look, make your decision, finish it off. Then using bind wire, just tuck it under your finger, give it a cut. Then wrap around three to four times. You want to have this nice and snug. You don't want it to come loose. Cause this is what holds the whole thing together. Then once you have that secured, twisting it tightly, making sure that it doesn't let go. And then using a pruner, cut your stems to length.
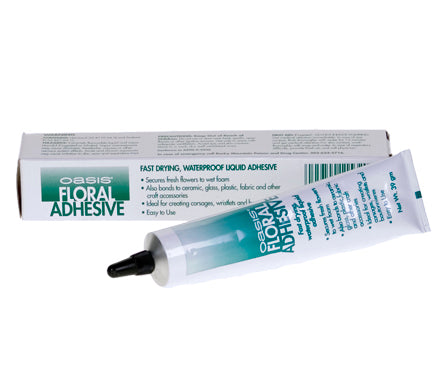
With all the flowers in place, now it's time to add the details. Some contrast, give it a little bit of excitement. It can be as simple as taking individual magnolia leaves, a little bit of oasis flow adhesive cold glue, right on the stem, and then gluing that right into the bouquet. But it gives the brown copper hue that picks up the branches, the dried and preserved fern, so beautiful. Cutting it down. Maybe leaving that one long, and then a little bit of glue, and enhancing out the sides, repeating that. Just a bit of glue, bringing it around, letting it drape. More leaves, more fern, until it's full and luxurious.
The finished design, a luxurious addition to any home to brighten those dark winter days, looks good from all sides. The recipe; I started with the bay leaf and magnolia branches. Then I finished with the bleached fern and magnolia leaves. The flowers; two calla, two hydrangea, six larkspur, six tulips, six hypericum, six of the green trick dianthus, six spray rose, six chrysanthemum, and for texture, a little bit of limonium. All-together, luxurious and fabulous.
During this winter season with the pandemic, flower gifting becomes more important than ever. Everyday gifts don't have to be a little and tiny. They can be big and luxurious. For more creative inspiration, check out our website at Flower School .com. If you have questions, you can reach us through there or pick up the telephone and call us at (503) 223-8089.
Now it's your turn. What are you going to create to brighten the winter day? As you gather your flowers, be sure to take a picture of the finished design posted on social media and hashtag Floral Design Institute. That way we all can see what you do as you do something you love.


