
Easter Nest Hand-tie Bouquet
Celebrate Easter with this cheerful nest-enhanced hand-tied bouquet! Filled with vibrant spring blooms from Florabundance.com and a playful touch of Easter eggs, this design is fresh, fun, and full of seasonal charm. Perfect for gifting, decorating, or sparking your own spring creativity. Enjoy—and happy designing!

Video Transcription
Easter is one of my most favorite holidays. Today, looking how you can take fabulous flowers and turn them into a beautiful hand tie. But of course, you've got to have the classic eggs, or it's not Easter. Let me show you how it's done.
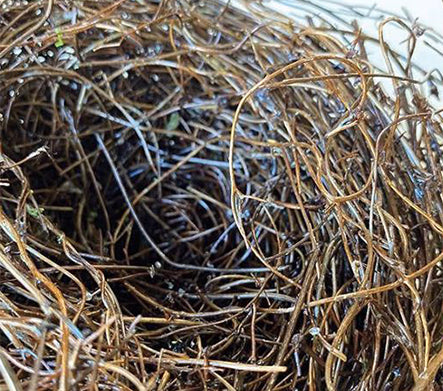
For the materials, I'm using a vessel from my shelf, one that I love, and then a Pre-Made Nest. For those of you who have been in basic floral design and advanced floral design, you know how to make a custom nest, which would make this even better, but for now, we'll use a standard one. Flower-wise, everything came from florabundance.com. We've got beautiful tulips. Oh, my gosh. Look at this ranunculus. It is amazing. And then the garden rose from gardenrosesdirect.com. It's called Hettie. It opens well. Beautiful petal count. Long lasting. And then a bit of dianthus to give some softness. This is going to be beautiful.
As I begin, I gather a bit of foliage. Salal is good because it gives you a nice base. And then tucking in some flowers, the Hettie rose can tuck in first, giving a bit of bulk and substance and beauty. I mean, how gorgeous is that? Then bringing in with the tulips. Tucking it. Removing odd leaves. Then the ranunculus. Feeding it in. Then giving it a slight turn. Then bringing back the dianthus. Pull off anything that's not needed. Your extra leaves and such. Just go ahead and pull those away. Then give it a turn again, and tuck in a few more tulips. They're so beautiful and drapey. Turn. Bring back to the Hettie rose. And keep doing that. Everything you do, you add it in at an angle, turn, add in again at that angle, and you can adjust height, high and low, so you can get a little more movement by letting it come outward. But everything you do, you feed it in, turn it, and then add.
As you continue, look in a mirror, and double check. See if things are where you want them to be because you can feed it in, sliding, then turn, bringing in additional stems. Sometimes you want to do two or three before you turn it. You want to get them set in place and then turn and add in a few more. Double-check yourself. See how it all fits together. You can always adjust a little bit by pulling up or down, but the overall design should stay the same. Just pulling it in, angling, turning, and adding until you get a beautiful, radial, hand-tied bouquet.
As I finish, I added a little more foliage to create a collar. Umbrella fern gives such soft movement. Lily grass, a little bit of draping. Adjusting. Turn that one over. There we go. Maybe another. And then looking at it in the mirror again to make sure you have everything where you want it. Tucking in and then using just a bit of bind wire. Tying it off. Holding everything together. Lashing. Then we'll cut it. Once everything is set, we'll cut it off. I'm not going to do this on camera because we don't need to watch that forever, but we'll cut that, and then we'll slide it through the nest to create the design.
Once you have it cut down, which you didn't have to watch me do that, you can set it into a vessel and enjoy. But if you want to make it a little more contemporary and fun, think back to your advanced floral design creating that nest. Now, this is pre-made. Pulling out the center. Pulling that, making sure that I've got room. If you do it yourself, using your techniques from advanced floral design, you can adapt that to exactly what you need. Then taking the design, tucking it together, and sliding it through gives you a full collar that covers all of your mechanics. And then sliding it down into the vessel. Tucking it in. And you're ready to go. The recipe, everything from florabundance.com. The amazing Ranunculus. We use seven of those to fill in. Then the Dianthus. Five stems. You can see they have branches coming out. The Hettie Garden Rose from Garden Roses Direct. We use seven of those. Then the Tulips to give soft draping. Five. Then two stems of the Umbrella Fern, five stems of Lily Grass, and just three stems of the Salal to fill it in.
As you finish, you can always tuck in little Easter eggs. So much fun to add that little bit of whimsy to the design. You'll find more creative inspiration on the website, flowerschool.com. If you have questions, you can reach us through there. But now it's your turn. Gather your favorite flowers. Find the perfect nest, or make your own if you're an advanced floral design student, and then take a picture, post it on social media, and let us all see what you do as you do something you love.