
Floral Pendant Necklace
One of the hottest current trends in floral design is fresh flower jewelry. You will find floral rings, necklaces, hairpieces and bracelets worn at proms, weddings, parties and special events. In this video FDI Lead Instructor Michelle Heandrick AIFD FDI creates a very elegant, innovative and easy-to-create floral pendant necklace. You are going to love the techniques that she demonstrates. Enjoy!

Video Transcription
Welcome to the FlowerSchool.com video library. I'm Michelle Headrick, AIFD, the lead instructor here at the Floral Design Institute. You know, prom is just round the corner, and that means you're going to need to come up with creative, new ideas to keep those girls happy. Glad you're joining us today because we have just that set up for you. This beautiful floral pendant-style necklace. It's easy to do, it's fast, and you can make it profitable.
With just a few simple tools and three easy steps, we'll create this amazing necklace. The tools I'm using today are pretty simple, and we probably all have them in our toolkits.
I have a pair of jewelers pliers. These are a round tapered nose. They're not the flat note, but those would work as well. Just make sure they don't have teeth. You don't want to mar the aluminum wire while you're working with it. I have a pair cutters. I have a pair of bail making pliers, but I'm not going to use those. I have a paintbrush. It'll make sense in a minute. A pair of shears. I have my Oasis floral adhesive. Some UGlu dashes. I'll be working with Oasis aluminum wire in the gold 12-gauge today. Then lastly, of course, I have my flowers and foliage brunia, salal leaves, a little bit of Italian ruscus, some Israeli ruscus, and lastly some beautiful miniature phalaenopsis orchids.
The first step we'll do is to create the neck wire for our pendant. Our second step will be to create the pendant itself. Our third step will be to embellish it with flowers. Let's start with step one.
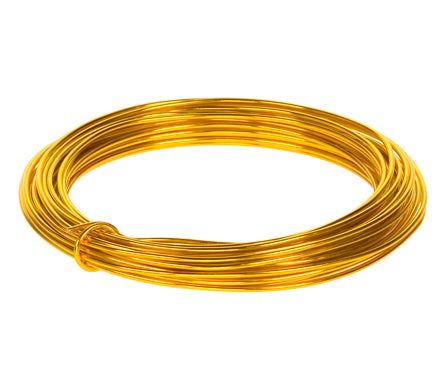
I have my Oasis aluminum wire in the 12-gauge in gold. You notice when it comes out of the package it's in these beautiful coils, everything is smooth, it's just nice and spiral. Take advantage of that. I'm going to cut about 10 to 12 inches. You might need 14, you might need 9. The reason for the difference is it depends on how low you'd like the pendant to hang, and the size of the neck of the finished piece. The size of the neck of the wearer, actually. With that in mind, I'm going to cut about 10 inches here, and then just gently open that up. I want to maintain as much of that nice, smooth curve as I can. It just means less work for me later, trying to smooth out bumps. These two ends are very sharp and raw, so I'll take my jewelers pliers and curl one end, that way I don't hurt myself, not a bad thing. I'm just making some smooth curls, creating a small spiral at the end. That will form part of our clasp when we're finished.
Now that we have our neck wire complete, we'll set it aside and move on to step two. I'll go back to my aluminum wire and take off about, again, about 20 to 36 inches. I'm going to use that fancy measuring trick we all learned as kids. Mine's about 30 inches. Again, the reason for the difference in the length is the smaller the amount of wire you use, the smaller and more delicate the pendant will be. Keep in mind the size of the person who'll be wearing it, so that scale and proportion work well for that end user. Again, sharp ends. I want to take my jewelers pliers and put a little curl on each end. That way, I don't cut myself while I'm working with it.
Now, here's the tip I want to share that I think is really quite cool. You can use something called bail making pliers. These are designed specifically to make smooth circles with your wire, whether it's sterling silver or it's aluminum wire, either way, it lets you wrap the wire around so that every circle is exactly the same size. You could buy these, or here's my tip. You could work with something like a chopstick or, in this case, a paintbrush. It has a little bit of a taper to it, but not towards the top end. I can use this to create the bail on my pendant.
The bail is the portion that attaches to the neck wire, and it's what allows that pendant to sit flat. If you don't create a bail, you could still work with it. You could feed that neck wire through your finished pendant, but sometimes it has the tendency to flop around a little bit. Creating this double loop bail makes it lay nicely and allows you a good surface to put on flowers.
To make that bail, I'll take my paintbrush, put it under my wire. I tend to like asymmetrical things, so I have a longer length to one side. Then I'm just going to wrap the wire around, push it closely together, so that I end up with two wraps of the wire across the top. Then I like to give it a little twist, and slide out my paintbrush. That creates this beautiful bail to go onto my neck wire.
Here's the really fun part. I take my wire and just wrap it around my fingers. I don't have any particular pattern to it. It's a very organic form when I'm finished, but it still has lots of rhythm and movement because of all these moving coils of the wire. I have something that looks like this. Now I just wad it up in my hands. Not very technical, but the end result's pretty spectacular. Again, no real pattern to it. But using those loose coiled ends as an anchor point, I can fold them over and around, locking those coils into place, and giving myself that base for my floral. When you find a shape that you like, give it one final look. Maybe an extra little twist here wouldn't be bad.
Then one other magic little step. Literally, I'm going to step on this. The reason I do that is it locks that wire into place, hardens it off, and gives me a very nice, flat surface. Now I have this beautiful flat piece to work with. Ready for flowers. That's my next step.
Now that I have the pendant form created, we'll add the floral embellishments to it. To start with, I'm going to work with a leaf of salal. Grab my scissors here, snip it off. Make sure that that stem is very flush in the back. Then I'll take a UGlu dash and apply it to the front of the salal leaf. I could use my Oasis Cold Adhesive to do this, but this is faster and I don't have to wait for it to dry.
Looking at my pendant form, I need to decide where I'd like to place this. The leaf serves two purposes: one, it hides any mechanics that might be peeking through as I assemble the rest of the pendant; and, two, it also provides a pop of color on the back of the pendant, which lets the dimension of that filigree wire show through a little bit more. As I look at that, again, I like asymmetrical. So, I'll have my leaf extending beyond the form of the pendant itself. Got a little carried away with my stomping. I just about smashed my bail. Now I have the leaf backing on the pendant itself.
Then I'll add some floral. I don't want to overdo it. Part of the beauty of this is the actual pendant itself, so just some simple embellishments really go a long way. I have some silver brunia berries. I'll snip a few of those off. Easier said than done. Let's go old school. We'll just pick them off. All right. We have a few of those.
Then I have these beautiful miniature phalaenopsis orchids. Now, if you work in a flower shop, you probably have these plants on your floor, so you can simply go out and snip a few blooms. No one will know, and you've got a beautiful piece of art work on the way. I'll take one that looks perfect. There we go. Then again with this, I'm going to cut it very flush on the backside. Then for this, I will use the Oasis Floral Adhesive. I could also use a glue dash, but the reason I'd like to use the adhesive is I have a cut wound on the back of that flower, and if I apply the adhesive to that wound, not only will it hold the flower in place, but it'll help seal over that cut, just like on a person, and keep the moisture in so the flower lasts a little bit longer. I want just a dab. I'll need a minute for that to cure.
While I do that, I can do the same thing and add just a little bit, not that much of a bit, to each of the brunia berries. You could also use hypericum. That would be lovely, especially since hypericum comes in so many colors.
Thinking about prom time, you have so many flower choices because you have so many dress colors anymore. It's not just the basic pink, or navy, or lavender. Lots and lots of options. That's another thing I love about working with orchids and the Oasis wire. They both come in a myriad of colors, so you can really match this piece to what the girl is wearing, totally custom, and she's going to love that.
My glue has started to bubble. Give it a little blow to encourage it. Then I'll add that orchid in, gently pressing on the face of it. Next, I'll add the brunia berries. Just a couple. Then we'll let that dry.
Now that I've finished embellishing my frame with flowers, you'll notice I did add another brunia berry, and a little bit of Italian ruscus, just one leaf, because I like the depth that it gives to the design. Now that I've finished that and it's dried, I can simply slide it on my neck chain, just like so, and then I'll finish off the clasp on the other side, so I get rid of that sharp edge. Using my jewelers pliers, I'll simply curl that edge around as well. The beauty of doing a neck wire like this is it's totally customizable to the wearer. I can adjust that clasp however it needs to be so that it fits tightly and lays nicely around their neck.
I think it turned out kind of nice. Wasn't that amazing? Three simple steps: create a neck wire, create my form, and then embellish with flowers. I have a beautiful piece of floral jewelry.
Our completed floral pendant. Isn't this fun? Now it's your turn. I'd like to see what you can do with a little bit of wire, a few simple tools, and some flowers. When you do make your creation, go ahead and tag Floral Design Institute on social media. That way, all of the Tulip Tribe can see what you've created. If you want more creative inspiration, hop on over to the website, Flower School .com. We have so many videos, so many tutorials, you'll spend hours. Again, thanks for joining us.


