
Garden Rose Dog Collar
A rapidly growing trend in the wedding flower business is flowers for pets. Many wedding couples now view their pets participation in their wedding to be just as important as the bridesmaids and the groomsmen. In this video clip Leanne demonstrates the techniques for creating a flower collar for a dog. Her model is the beautiful and very patient “Foxy”. FDI teacher Marissa is Foxy’s Mom. Foxy loves to come to the office with Marissa and really appears to enjoy being on stage. Enjoy!

Video Transcription
Welcome to the FlowerSchool.com video library. I'm Leanne Kesler, Director of the Floral Design Institute. Today, I'm in the studio with a special guest. Foxy has joined us because flowers for pets is on trend. I want to show you how to make a fabulous garden rose collar perfect for Foxy to wear at the wedding. We'll have you a little treat, there you go. She's loving being on camera.
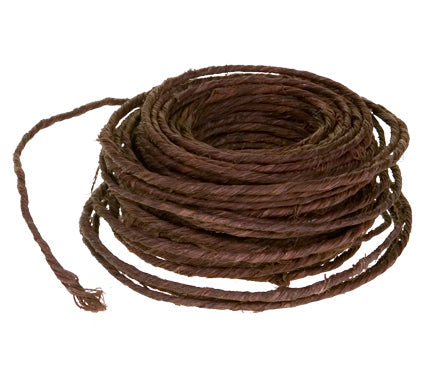
Foxy is a rescue dog. She's about eight years old and she comes to work with teacher Marisa. Today, we decided that, wouldn't it be fun to have her be a movie star, so she'll be with us. The mechanics for her collar is going to be barked wire. I pre-measured it, cut it, and it'll fit right around her neck like so. Now, I don't want to try to fasten this to her, I want to have it to be a little bit more comfortable. Using a bit of ribbon that I can then tie and a bit of bullion wire to lash it together. Just pulling off the bullion, doubling it, because it makes it go a little faster. Double it again. Then, making a little loop, feeding the ribbon through, flattening it. Basically, I'm just securing it in place. Then using the bullion wire, band that around to make sure it doesn't come undone.
You can see I have the two ends ready to tie. Let's give her a little peak so she knows what to expect, maybe a treat. We'll just come and tie it right around. But now, I need to add flowers. Steal it back from you. I give it a little twist. I'm going to make it so that the flowers are at one side, not in the middle, and that way when I tie it, it all fits together. Give it just a bit of a twist. See how that's going to go on you? You're going to be so cute. You'll be stunning. Then using the Oasis Floral Adhesive, some ruscus and some galax. I'm going to glue a little base, so I'm going to sneak around behind you. There you go. Don't you love it? Oh my God. Stealing the glue. Taking the Oasis Floral Adhesive and putting it on the leaf. Just a base to start, letting it begin to dry. Then adding onto the ruscus. Then the leaf .... getting things gluey here. There we go, goes onto the base, so I start it, and then adding in the ruscus to get a little bit of texture and color, ready to wear.
We have the base prepared. You can see the leaves are there. The galax on the back means that she won't be scratched or poked by any of the flowers, the glue won't go near her fur, and it's ready to wear. Then, I'll give you a little treat so I can bring this around. It'll just tie right around the neck and then you can adjust whether you want it towards the top, towards the side, wherever it's going to look best. Then we'll add a beautiful Juliet garden rose. Isn't that grand? I've cut it flat, left the sepals. I think she likes it. A little bit of glue. Catching the petals, I want to make sure that it's going to be secure. Then gluing over the cut end, because that will lock the moisture in. Let it begin to dry. Then gluing it right down to the base.
Once the rose has set and it's secure, you can go back and add accent materials to give it a little bit more love. What do you think? I think she likes it, but she wants more. She says, "I'm a movie star, I want it to be glamorous." Using a little bit of astrantia to bring in that beautiful purple hue. A little glue there. Then tucking it in. A little bit of heather to bring in the soft pink, so we're getting that whole blush pallet. You liking that a little better? What do you think? Yeah. You can see the textures, the hues. Adding a little more just to fill it in and adding in just a touch more astrantia, a touch more heather, until it's perfect.
The finished piece is ready to tie on. Now, if you were doing this ahead for a wedding, spray it down with Crowning Glory, let it dry, put it in a plastic bag, and stick it in the flower cooler. It will last for a couple of days. Then the day of the wedding, take it back out, and you're ready to tie it on. Let's see what that will look like. Like a treat? There you go. I'm going to put this around your neck, okay? There we go. Give it a knot. Tying it like a bow. You are so good. You just sit there so kind. Why don't you look at mom now?
Isn't that beautiful and isn't this the greatest dog ever?
What fun it has been to have Foxy in the studio. You can see, flowers for pets, they're on trend and they're a lot of fun. Key, is to make sure you have chicken available. Look what I've got over here. Look at. That gets them pretty excited. For more creative inspiration, check out the website at FlowerSchool.com. The website contains hundreds of floral design how-to videos, floral design classes, online floral classes and DIY flowers. If you have questions, you can reach us there, or give us a call at 503-223-8089. Of course, we love to see what you create. Take a picture with your pet, post it on social media, and tag Floral Design Institute so we all can see. Because now, it's your turn. Have fun and do something you love.


