Garden Rose Wedding Centerpiece
Welcome to the Flower School .com video library. Today I want to share with you an elevated or floating centerpiece done with fabulous garden roses. It's an easy one to do once you know the mechanics.
As I was choosing my flowers I went to GardenRosesDirect.com and started looking at all the different garden roses. I wanted something that picked up on the Pantone Color of the Year, Living Coral, but with a little gradation to make it more interesting. I found two that were perfect, the Princess Sukura has depth of color going into the blush, but then the coral, especially on the tips, so it pulls it all together. And then, Loves Me Just a Little Bit, love that name, that surprised the heck out of me. Look at the great coral, and then the little touch of yellow in the center, the two combined, very on-trend. Then, to finish it off, just a few foliages, some aspidistra leaves, some eucalyptus, and agonis for a deeper hue.
The frame, it was actually made by a student of ours, Vivian, she used it for a floral demonstration and then left it with me, so that's where this came from. How I did this, that's what I'll share. Scooch it down, because I want this to be two-sided, it's a centerpiece, so I don't want a front and a back. On this end I'll do a second piece, it gives a little bit of transparency between the two. If you had a large budget you could go all the way across on both sides, but for this one, little bit smaller.
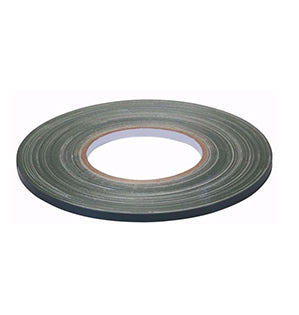
For the flowers, a spray bar, and it gets anchored right on. The easiest way to do this, use a UGlu strip, undo, and then stretch it the whole length of the spray bar, then fasten that down, making sure you overlap on the end just a little bit. Now that gives you a bond to get started. It's not secure, I can pull this back off, or it could topple, but that starts it, then using your waterproof tape anchor everything to the frame.
To cover the mechanics the easiest way is to start with some aspidistra, you can just cut it, then place it into the brick, wrapping it around, then, either using a greening pin, pin it into place, or just take your next leaf, cut through, then pierce it right in, then begin wrapping again. A leaf or a pin, repeat that. Now you want to remember that the bottom, someone could look, you want to conceal that too. So taking a moment and adding a leaf, even had to fold it up and in, then around, and pin it directly into place, tucking it in. One last leaf over the top, making sure that everything's concealed. You're going to have your flowers there too, so it will all work, but it's just kind of nice to get started. Now I didn't even pin that, because I can come back then, with my eucalyptus, and pierce straight through, and begin the draping with the eucalyptus to create a beautiful, luxurious base for the roses.
Depending on how full you want it, you can keep adding more stems, getting it lusher. I'd like to add another bit of another foliage, in this case salal, just for a contrast in hue and leaf shape, bringing that in, letting it come out the end a little longer, and you bending down a little bit. Then, looking at it from front and back to make sure that you get it consistent, and covering the top as well.
Now comes the fun part, adding in the roses. Think about the two colors and grouping them, so it's not just a random polka dot, maybe you do three of the Princess Sakura, some a little taller, some a little shorter, but grouped close together, bring it down towards the front. Then, Loves Me Just a Little Bit, a different hue, grouping them, again different levels, repeat this until you get the bar completely covered.
Once you have all the roses in place look at it on the front and the back, make sure it's totally beautiful, look from the ends, both sides, and at the two coordinate, and I make sure to leave space between the two pieces so that you could see through. Last, enhancing with the agonis, picking up that chocolate brown, which adds such richness to the coral, and extends from that blush, to coral to almost a burgundy. Just tucking it in, making it trail a bit, finding a little hole, and crossing over. Even bring it into the interior of the design, and then front, back, top and bottom.
If these roses look familiar to you, you're correct. It's the same variety as I used in the classic bridal bouquet. If you missed that go back to the website, Flower School .com, and you'll love that one. It's a classic bouquet that's perfect with this grand centerpiece.
Now, a recipe, so many of you asked, and I'm trying to remember to share the recipe now. It is 24 of the Princess Sakura roses, 24 of Loves Me Just a Little Bit Roses, both of those from GardenRosesDirect.com, so you can look it up and order your own. Then foliages, I had eucalyptus, about half a bunch. agonis, about half a bunch, and salal, about a third of the bunch. 10 aspidistra leaves underneath everything. So, the base is 48 roses from GardenRosesDirect.com, and the foliage's, whatever your favorites. Two spray bars, tape, UGlu, and the frame.
Now it's your turn, if you've got questions, don't hesitate, you can find me at the website, Flower School .com, or pick up the phone and call me, 503-223-8089. But I'd love to see what you create, take a picture, post it on social media and tag Floral Design Institute, that way we all can see, as you have fun and do something you love.


