Hand-Tied Bouquet Tutorial
The Hand-Tied Bouquet has become an essential design style for professional floral designers. In this Flower School How-To Video Leanne carefully demonstrates step-by-step how to create a hand-tied bouquet using the spiral technique. Leanne admits that the technique is not easy. Beginners will discover that they have to practice the technique many times to get it right. But, once the technique is mastered it can be used throughout the year on many types of flowers. This technique is sure to become a favorite. Enjoy!
Video Transcription
Welcome to the Flower School .com video library. I'm Leanne Kesler, director of the Floral Design Institute. And today I'm here surrounded by lovely purple flowers going with the lavender palette and creating a spiral hand-tied bouquet.
The key when starting a spiral is to make sure and just prepare all of your materials ahead of time. I have the beautiful quicksand rose. All the thorns have already been removed all the lower foliage already removed so that they're ready to pull from and work with. Sweet peas, clean and ready. scabiosa, sweet William took the time to remove all of the leaves off the sides and then agapanthus, shaking them out, making sure that the florets are all beautiful. For the gunni eucalyptus, making sure that I've stripped the lower levels. So that then all I have to do, I know that sounds so simple. All I have to do is start assembling.
As I begin. I just gather a stem, maybe too. Just depends on how you want to cluster them in your hands. Maybe put them staggered a bit of the eucalyptus. And then as I work, I start spiraling. Taking a stem, placing it, angle, then turn, and can add another and turn to bring in more of the eucalyptus to be another rose turn. And every time I work, something might slide down I can tug it up. Then grabbing more blooms and always placing them in my hand with the same angle so placing the bloom, turning, giving it a tug back up another bloom, turning. As I work, I keep my hand loose. I hold it with just a finger and a thumb. It's like you're saying, okay. The flowers do wobble around. That's okay. Just think it's okay. You can do that. Adding a stem in each time, turning it a little more eucalyptus, scabiosa, turning. And it's very loose. Very gangly. That's all right, go ahead and let it just relax in your hand. When you're done it will tighten up, but for now, let it relax. Let it seem a little floppy. Don't be afraid to add a few blooms at a time, then turn, think about your spacing. Give it a tug if you want it up a little bit. Come in with another bloom and another and each time turn it and then add.
Some people find it easier to work in front of a mirror. That way you can see where you're placing the blooms. It really is a personal preference. I find the main thing is that I just relax with it and don't try to control it too much at the beginning because if you try to control it, you get very frustrated because there is no control at the beginning. The stems really do want to just do their own thing. And you're like, "Oh, but I want it over here." And it doesn't want to go over here. It wants to go over here and then it's all right.
Be patient, keep practicing, keep placing them in. The beauty of a hand tie is if you don't like it at the end, it's easy to take it back apart because you haven't really cut anything. You're just spiraling it into your hands and you can stop and say, "Hmm, I don't love that. I think I'm going to start over," and you can just set it down and start over.
Continuing just filling in with blossoms. I keep spiraling the same direction. That's always the big part is don't change. Be consistent, turning. Thinking about which colors you have where so that you balance. Right now all my scabiosa is on one side. As I spiral on around, we're going to want to bring some over to this side. So is not just in the one area. Maybe do a few of them. Sweet peas. Turning, few more of those lovely quicksand roses. Turning. Thinking about my spacing, bringing in the last agapanthus. A little bit more of the sweet William. Turning, sweet pea, sweet William, scabiosa. And you can see you just start tucking it in, and now that we're getting closer to the end, it starts looking so pretty. Everything starts fitting together. Thinking about how many more roses I might want. And then lastly, just adding a bit more of the gunni eucalyptus, sliding it in, turning, bring it on around, giving a nice collar to the bouquet.
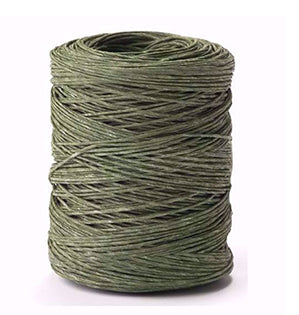
For a final touch of lightness and texture. We can go back and add in a little bit of Queen Anne's lace, letting it come out longer. Again, thinking about the spiral. Can't change that. It's totally fine to take a piece and feed it in. Just make sure you're going through that same spiral shape, the same angle, feeding it down, pulling it, getting a little bit over the top, tucking it in, repeating that. Turning. Looking where else I might want another piece. Then once I have everything where I wanted and it's full, textured, finished, look at it in the mirror. See if you like your placement, then using bind wire, just cut off a piece and wrap that three times securely to make sure that it stays in place.
Once you have the bouquet done, you can cut the stems down. Notice that everything's clean on the bottom. No thorns, no leaves. It's all nice and tidy, tied off with the bind wire. Then if you did it well, you can just tap it and it will stand all by itself. You could put it in a saucer of water, but I want to make sure it's going to last for a very long time. I want a larger water reservoir. So, I used a trifle bowl. Yes, it's from the kitchen, a trifle bowl, and just set it down in and you're ready for a party.
The hand-tied spiral bouquet is so much fun. You can use whatever flowers you have. For this design we used five of the agapanthus, 15 of the quicksand roses, then almost a full bunch of the gunni eucalyptus. Then I did go to bunches, 10 stems of sweet William, 10 stems of the sweet pea, 10 of the scabiosa, and then 10 of the Queen Anne's lace. Tucked together. Pretty fabulous.
The hand-tied bouquet is one that you will love to use over and over and over, especially in the spring and summer month, because it works with anything you can go gather from your garden, but I will be honest. It is harder than it looks and it does take practice. I know for me, I hid in my back room of my flower shop and practiced over and over and over because I couldn't get it to work. And then magically one day it just happens. And then you can do it for the rest of your life. So, if you're struggling, know that you're not alone. Go ahead, struggle. Take it apart. Do it again. Take it apart. Do it again. This is your teacher talking because with that practice, eventually, I promise you'll be able to do it.
For more creative inspiration check out the website at Flower School .com. If you have questions or if you just need a little buck up, little buckaroo, give us a call at (503) 223-8089. Now it's your turn. I challenge you to master the hand-tied bouquet and have fun as you do something you love.


