Hand-Tied Garden Style Bouquet
Creating large and lavish floral bouquets takes practice. In this video demonstration Leanne shares the techniques for making a large hand-tied bouquet as she creates a beautiful garden style design. View the video demonstration, then gather some flowers and practice, practice, practice…… You too can be a hand-tied bouquet expert. Enjoy!
Video Transcription
Welcome to the Flower School .com video library. I'm Leanne Kesler, director of the Floral Design Institute, and today I'm here to share with you a luscious hand-tied bouquet focused on all the fabulous flowers that are available to us in the springtime.
The inspiration for the bouquet was the wonderful curly willow as it starts to leaf out in the springtime. That soft green, so fabulous, and it's just going to get leafier and leafier in the bouquet. Then I decided I needed some darker green, so a little salal, a little Italian ruscus. Then I just started looking around, I thought, "What else do I want?" The green kale, pretty wonderful. Some white hydrangea just to brighten it up a little and then some spray roses, lisianthus, peonies and carnations. The contrast between pink and green will be so much fun. Each of the stems have already been prepared, removing the lower foliage, making sure there are no thorns, laying things out so that as I go to create, all's I have to do is pick it up and add it together in my hands.
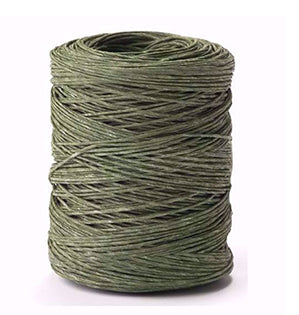
I like to start with heavier things at the beginning. So maybe some salal, looking at it, picking off any damage leaves, pulling it apart, loosening it up. A little bit of the Italian ruscus, weaving from one side to the other in my hand. Maybe a little more salal for some fullness and substance. Maybe a little more of the Italian ruscus. You can see how I just add it into my hand. I'm doing a combination of the weave, feeding it through, crossing through that central binding point and a spiral where I just add it to my hands and then turn. Making sure that I keep it balanced from side to side. Bring in more of that willow. So wonderful. Then thinking about the larger things first because it's easier to sneak in little stems, but the big kale sort of needs to go in early so that there's room, just sliding it in, then turning same with the hydrangea, bring it in, turning, adding in more of the willow, another kale, another hydrangea and turning. Now I'm getting so much in my hands. It's getting hard to hang on. At any point when you feel like you need a little more control, just use a bit of bind wire, give it a cut and lash those stems together. That way you can set it down, keep working, gather more flowers, and then add more.
The addition of flowers then just spiraling it around. Maybe a rose, turning it. Maybe bring in a little of the lisianthus, keeping it loose and carefree. I can go back and add more willow, maybe a peony, then turning and not worrying about precision. I know, I'm a teacher, we're supposed to be precise with things, but sometimes this casual look is really what you need, especially in the springtime when you think about new growth coming to life, flowers exploding around the city and it just gives you that exuberant excitement. Tucking it in, more willow, turning, thinking, "Oh, I wish I had another hydrangea." Well, I do. Setting it in. Maybe a little bit more of the salal and another willow, and then if it starts to feel uncomfortable, again, take your bind wire and lush it off so that you don't lose control.
As you want more color on the inside, it's perfectly fine to weave it through, sliding it down, making sure you capture the stem. Maybe a little bit of lisianthus in there as well. Brightening the center of the bouquet, pulling, adjusting where you want it to fall. Then turning again, looking where else you might want to add another rose, another carnation, another peony, keeping it full, lush and exuberant. Balancing it from side to side, turning your hand and then once again tie it off with bind wire for control.
As a final detailing you can go through, cut your stems down or you can wait and do that after you find your vessel. I shorten them a bit, so they're all about the same, but I'll finish that again later. Then go back, maybe add a little more willow for just another touch of lightness since that's was the inspiration originally, I want to make sure I have plenty of it. Bringing it in, finding the perfect spot, then turning, adding a little more, then to collar, to end up the base of the design, to finish it, a little bit of Fatsia. The big leaves are so grand, just setting them down in, tucking it in your fingers and it gets harder and harder because there's so much you're hanging on to. Then once again, once you have it all in place, go back, lush it with bind wire so that you don't have to worry about how the structure stays.
Once you do cut the stems down, get them all flush, it will actually stand on its own. Might have to pound it a little bit to line the stems up, but when it's full and lush, it has so many feet to support it. The recipe, add three kale, three hydrangea and about a half a bunch of leafing out willow, then I used an entire bunch of spray rose, ten stems, five peonies, ten carnations, and ten lisianthus. Add in a few stems of Italian ruscus and salal, some fatsia leaves and you have a fabulous hand-tied bouquet.
Creating big lavish bouquets takes practice. Learning how to get it to stay in your hand and it takes quite a bit of bind wire. Don't be afraid to stop several times and lash it off. No reason to make yourself frustrated trying to hold it together. Then you know from flower school, I always recommend a knife, but when I'm working with things like this, it is easier to use a bunch cutter or a pruner. That way you don't have to worry about struggling with the knife. You'll find more creative inspiration at our website, Flower School .com. If you have questions about any of these techniques, you can reach us there or pick up the telephone and give us a call at 503-223-8089. Now it's your turn. What big, fabulous bouquet are you going to create? Gather all your favorite flowers. Make a design. Be sure to photograph it, post it on social media and tag Floral Design Institute so we all can see what you do as you do something you love.


