Harvest Orange Pumpkin Design
Celebrate the season with this Harvest Orange Pumpkin arrangement! In this Flower School How-To Video, Leanne transforms a classic orange pumpkin into a rustic fall centerpiece with branches, berries, seed pods, and cattails. It’s festive, natural, and perfect for Thanksgiving tables, autumn gatherings, or cozy home décor.
Video Transcription
Autumn comes in so many colors, but orange is the first thing you think of because of pumpkins. Doing a design foam free, textural and fabulous, let me show you how it's done.
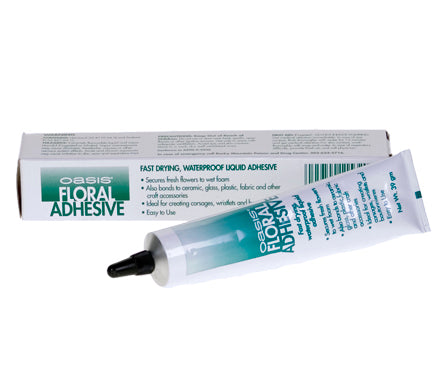
The pumpkin already carved out. I used all of the procedures that we taught you in the Tulip Tuesday. You can look at that online in the playlist. Once it's set, you can add in a vessel that's going to hold the water to keep it away from the pumpkin, fresh water mixed with Flower Food. Then for the lid, used skewers, placed them in and then glued it with Oasis Floral Adhesive to make sure that it doesn't let go. Then determining how long I need it, it'd be a little bit shorter, cutting them down, and then I can just set that in and begin designing.
Bittersweet, such a wonderful autumn material. It winds around and you can just set it in. It's going to dry and look beautiful no matter what, but letting it come out just be wild and crazy. Bringing another bit and winding it, tucking it in. Finding the perfect spot, and then winding it around, and then using a Greening Pen and just tucking that in. Locking it in place. So I'm actually piercing it straight into the pumpkin to secure it, to be safe. I would do it twice to make sure that it doesn't come back out. Finding the perfect spot, inserting. And then bringing back another bit, maybe cutting it down to give me a little bit of extension. I think it'd be wild, casual and beautiful.
As you work, turn it. Make sure that you like it from all sides. You can see the back has a bit of a hole at the moment, but it still all pulls together. So I want to go back and add into the back area and I have a beautiful, dried banksia. They'll give me substance. Cutting it down and then letting that go in on the back side. Filling in, still look good from the front but it adds substance to the back. Then going with beautiful foliage. This is maple, complete with the lovely helicopters from teacher Michelle's yard. Just giving it a cut, pruning down the side so that you can get it into the water, and letting that come out. Filling in, coming from both sides, giving out that very natural four-inch look that's so popular today. Then adding in some cattails for a little extra height and maybe some sedum to add some texture at the base.
To finish, just adding a little more texture. Some sorghum, picks up that autumn vibe, maybe bringing some around to the back so it looks good. Front, back, side to side, and some scabiosa pods. Again, that autumn hue and wonderful texture. Taking it in and radiating from the central binding point.
The recipe, I started with the pumpkin, you can get the whole care instructions in the Tulip Tuesday, Pumpkin Care, you can look at that. Then I went to the Bittersweet, and I used three stems that I wound around to give a good base to everything. Then I filled in with the maple from teacher Michelle's yard, that finished it off, giving it a truly autumn vibe. Then that single Banksia tucked in to create the emphasis, two stems of Sedum to add the depth. Five Cattails. And then as I was finishing, I added in ten of the Scabiosa Pods and six stems of Sorghum to get that texture to finish it off.
Autumn, the season for pumpkins and adding in so many treasures, both fresh and dried. You'll find more creative inspiration on the website, flowerschool.com. If you have questions, you can reach us through there. But now it's your turn, find your favorite pumpkin, carve it out and design a way. Be sure to take a picture and post it on social media. #FloralDesignInstitute, so we all can see what you do as you do something you love.


