Homecoming Floral Ring
Welcome to the Flower School .com video library. I'm Leanne Kesler, director of the Floral Design Institute, and today, I'm here to share with you an on-trend floral ring. It's perfect for homecoming.
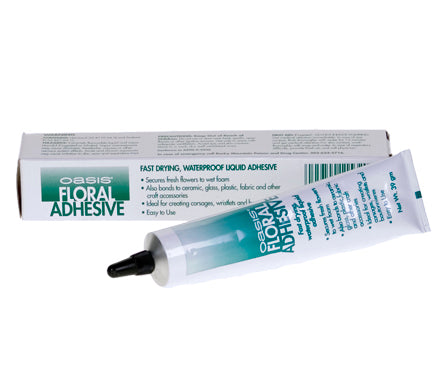
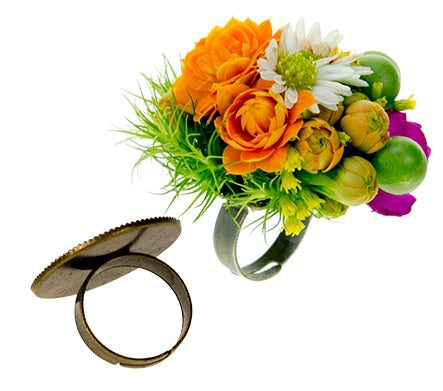
Homecoming today is oftentimes more casual, so I picked a very bright palette: orange rose hips, yellow crespedia, hot pink gomphrena, and then to tie it altogether, the muted gray of seeded eucalyptus, and a bit of sedum. The base is a ring blank, and yes, we have these available online if you can't find them locally, and then Oasis floral adhesive to adhere it altogether.
To create the base, start with your glue, and just put a bit on the blank and let it sit because you want it to really begin to set before you move forward. Then while I'm waiting, I go back and prep my materials. Just want to completely remove the stems. Clip them down. Lay that out so that it's all ready. That's probably enough.
Then going back. Seeded eucalyptus, just breaking it down into smaller bits. You can use the leaves or not. Really optional. A little bit of sedum. Then starting with a delicate first, maybe a leaf. Put a little bit of glue on that. Let it begin to set. The seeded eucalyptus. Let that begin to set, and the sedum. The trick is that it's glue to glue. That's what allows it set well. Bring it down. Bring it in. If you just tap, pull it up, and then set it back down, that glue to glue will give you a very, very firm bond.
Before you move on to the rest of your materials, make sure it's totally set. You may even have to apply a bit of pressure to make sure that it stays put. Then you can check to see how it fits on your hand. That way, you have a strong base that you know will support all the flower. Then let that continue to dry a bit, and go back and add glue to my other materials. Letting it set.
Then blowing on it to continue the setting. When it gets bubbly, that's when you know it's ready to adhere. Again, tap down, leaving a bit of glue, then go back and place it so you get that glue to glue, which gives you such a firm connection, and adding the next bloom. Tap. Place it. Tap, and then place it. Each time, just tapping it in and then placing it. Even overlapping just a bit to get depth.
The finished piece will be sturdy in just a few minutes. Just keep a bit of pressure on the various blooms to make sure they stay put. Then let it sit. After five minutes or so, you can box it, put it in the flower cooler, and it's ready to go. When taken out to wear, it's beautiful.
For more creative inspiration, check out the website, Flower School .com. If you have questions, you can reach us through there, or pick up the telephone at 503-223-8089, and I'd love to see what you create. Make a ring. Wear it. Take a photo. Post it on social media, and share. Make sure you tag Floral Design Institute so we all can see because now it's your turn. Have fun and do something you love.


