Marvelous Floral Cuff
Floral jewelry is both practical and increasing popular for weddings, proms and special events. In this Flower School How-To Video Leanne creates a beautiful and fragrant floral cuff using locally grown flowers and foliages. The design is created on a cuff crafted from Oasis one inch flat wire. Lamb’s ear, yarrow, spray roses, butterfly lavender and eryngium combine to to finish this on-trend design. Enjoy!
Video Transcription
Welcome to the Flower School .com video library. I'm Leanne Kesler and today I'm here to share with you a contemporary floral cuff. It's perfect for summer weddings and events.
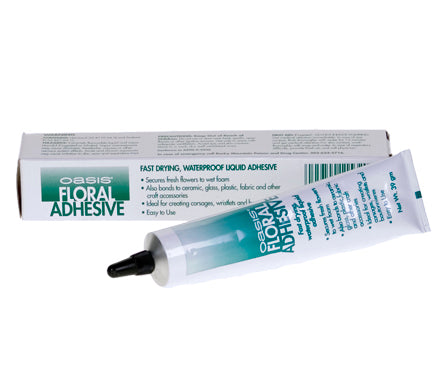
The base mechanics, it's built on one inch Oasis Flat Wire. I'll be molding that using a bail plier. Then I've got Oasis Floral Adhesive, cold glue, a UGlu strip. And then for the florals thinking all local, all seasonal. Everything was grown right here in Portland, Oregon. Got some yarrow, eryngium, lamb's ear, little tiny roses and then the delicate butterfly lavender.
To begin, cut off a strip of the flat wire. I used about six inches. You can make it smaller if it's for a very young woman or larger if it's for a larger wrist. You've got choices. Then using the pliers, grab it and twist, curling those sharp edges inward so that they can't snag or cut or scratch. Again, grab it, twist, rolling it around. It gives you a nice, organized way to work. Then you're going to bend that so they'll go right over the wrist and you can adjust it, again, tighter or looser, depending on what you need. Last step in the preparation is a single UGlu strip. Pull that off and then set it directly across the top and pull it off, which gives you then a nice glue base to adhere all your materials.
The lamb's ear gives a wonderful texture for the base. Just cutting it off, individual leaves, looking for different sizes where you can add a little bit of contrast. Maybe one more. There we go. Then you could just stick it directly onto the glue strip, but I find that it works even better if you use just a small amount of the Oasis Floral Adhesive. That way you're going to have glue-to-glue on the back. It'll make sure that your base is very, very stable. Just a small amount, not much. And letting it begin to set and then just placing it right onto the base, applying a little bit of pressure, and repeating. Then you can go back, add in additional leaves until you get a nice textural base to begin.
The addition of eryngium adds such wonderful texture, and then little bits of yarrow for some brightness and again, additional texture. Placing these items first, saving the treasures, the lavender and roses, for last. Just cutting them down, small bits, then tiny bit of glue. Let it begin to set and then carefully applying it in, holding a little bit of pressure until it sets to make sure it stays in place. The yarrow can tuck right underneath, coming on across and then add additional bits until you're happy with the finished placement.
With the solid base, you can see how beautiful, and it gives you a wonderful starting point then for the rest of your blossoms. Cutting off a few of the roses, thinking about the size and the proportion. And then a few of the lavender, then tucking them in, thinking about the focal emphasis, the main impact, adding the beauty. I want my emphasis right here towards the center, but slightly to the side. Then adding a second bloom there as well. Pulling your eye to the opposite side. Again, applying just a bit of pressure to hold it in place. Make sure it's secure. Then coming back, radiating outward from that emphasis area it becomes a binding point, a central point for the design and carrying your eye on out towards the sides and filling in. Then look at it from the front and the back. Make sure you like where everything is and glue in a little extra if you need it.
For the finishing touches, you just go back and fill in any little holes. Maybe you need one more rose to finish off the emphasis. Tucking it in with the others. Applying pressure and then to lengthen out to the side, one more of the lavender. Perfect little spot to squeeze it in. And then to brighten, just a little bit more yarrow. You can always just add little bits to make sure you have absolute perfection.
The recipe focuses on local materials. Think bits that you could gather, possibly from your own garden. I used lamb's ear, yarrow, little tiny spray roses, butterfly lavender, and a bit of eryngium. The base, one inch Oasis Flat Wire, a single UGlu strip, and then the Oasis Floral Adhesive to put it all together. Makes a beautiful cuff.
You'll find more creative inspiration at Flower School .com. If you have questions, you can reach us there or pick up the telephone and give me a call at 503-223-8089. Now it's your turn. What are you going to create using the cuff technique? Be sure to take a picture and post it on social media, tag Floral Design Institute. That way we all can see what you do as you do something you love.


