Shades of Gray Wedding Bouquet
In this Flower School How-To Video the focus is on the 2021 Pantone color of the year, Ultimate Gray. While subtle moody hues have been growing in popularity for some time, the announcement by Pantone naming Ultimate Gray as one of the colors of the year will certainly bolster this trend. Leanne creates a marvelous hand-tied bouquet built on a floral netting armature. Gorgeous garden roses set into a textural base of gray foliages results in an amazing design. Enjoy!
Video Transcription
Welcome to the flower school .com video library. I'm Leanne Kesler, director of the Floral Design Institute. Today, I'm here to share with you a fabulous wedding bouquet featuring shades of gray. The mechanics, the bouquet will be built on floral netting, a staple in the floral industry. I cut it to a size of nine inches by eight inches, and then I just rolled it into an armature and secured it, so that will be the base of the bouquet. The materials from florabundance.com and gardenrosesdirect.com. As I was searching their website, I typed in the color search, which they use silver, and it brings up the whole palette that goes so well with the Pantone color of the year, Ultimate Gray. So, I have brunia, kangaroo paw, silver sage, dusty miller, and eucalyptus, all perfect for the shades of gray palette. The roses, one from Florabundance, Menta, a soft beigey gray with a hint of blush. Now, depending on the time of year, it can change the color just a little bit, but that's part of the beauty. Then paired with Garden Roses Direct, Westminster Abbey, and Garden Roses Direct, Amnesia.
The three give you a beautiful combination, all with that hint of gray that blends beautifully. To begin the bouquet, you want to start the handle and the form with your foliages. Starting with some eucalyptus, and bringing it through, letting it drape to the side. Repeating that coming from the opposite side, through, and that's the beginning of your handle, and a beautiful horizontal form creating the line. Then repeat, bringing in additional pieces, some to the front, some more to the back, so that you're drawing the eye from front to back, side to side. The eucalyptus is perfect for that draping movement. Then coming in with a bit of the dusty miller, finding a perfect spot to feed it in, and repeating. As you work, you begin concealing the overall armature, you can bring some down through the top, getting a little fullness begun. You can pull from the bottom, insert from the top, do both. Give it a twist to get the face looking to the front. Then going back, once you have your form begun and the handle is established, then you can go back and start adding your roses.
The Amnesia, Westminster Abbey, and the Menta, and then continue until it's full and lush. As you can see, the armature still shows, front, back, bottom, but it won't when we're done, so you don't need to worry about that. Just go ahead and continue adding your roses, bringing them out to the side to elongate, feeding it through, you can always pull it. Maybe grouping to get more visual impact from each color. Bringing in the Amnesia, creating that horizontal movement, and the Westminster. Then to carry the eye through, so you don't have just one, two, three, maybe bring in another Westminster down low in the front. It's perfectly fine to put it underneath the armature to help draw the eye downward. Maybe bringing another of the Menta across to the opposite side, carrying the eye through. Again, adjusting height so that you have a variation, taking the Amnesia over to the opposite side. As you're working, if you stand in front of a mirror that way you can see how it looks from the front, and work from side to side, front to back, carrying the eye through.
Now comes the fun part, adding in the ultimate gray. Some of the sage, the silver hue is so fabulous, and it can come out elongating the side even more. Pulling it through, tucking it in, and repeating. Coming through to the opposite side, adding in a bit of the brunia for wonderful texture. You can see the roses, once you add the gray, it brings out the gray base of their bloom. Coming in with the kangaroo paw, each stem adding greater texture, greater contrast, and greater beauty. For an extra bit of lightness, and a little bit of whimsy, feeding in some beautiful Ultimate Gray bunny tails. Having them come in right through this center, leaving them a little taller, and repeating. Finding a hole to feed it through, it's always the challenge, there we go. Getting that lightness going on. Once they're in place, you can manipulate them a bit to fluff them out, and adding just a bit more of dusty miller coming out to the side. This is when you start making sure that you've totally covered the armature, so that nothing's going to show, adding visual weight to the base.
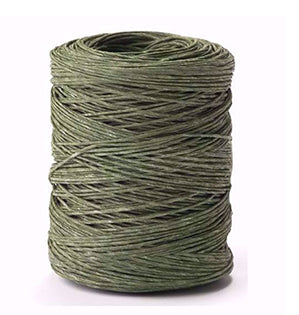
Then coming back with more of the eucalyptus. You don't want just two wings coming out on either side, you want to go ahead and enhance that, bringing additional pieces, adding soft movement, and draping to finish the bouquet. Now, that the bouquet is complete, the armature is hidden, I bind it off with bind wire. Just clutching it in my fingers, clipping it from the bolt, and then wrapping around at least three times to make sure that it's totally secure, nice and snug. Capturing all of the stems, and then twisting it tightly, securing it in place. Then cutting the stems with a pruner, you don't want them too long, about a hand length, and then chop it off. Then to conceal the wire, the bind wire, make sure no one can see it, a bit of ribbon tied around the top. Gathering the flowers for this bouquet was so easy, I just went to the florabundance.com website, then I searched by color. I used silver, which gave me all these great gray hues. Then I went to the Garden Roses Direct site and looked for roses that coordinated.
My recipe, I started with the eucalyptus and the dusty miller. Then I added five Westminster Abbey roses, five Amnesia roses, nine of the Menta rose. Then 10 each of the kangaroo paw, brunia, and silver sage. Lastly, I tucked in the bunny tails in clusters to create an amazing shades of gray bouquet. The moody hues have been so popular for weddings for quite a while now, and this year with Pantone coming out with their colors of the year of Ultimate Gray and Illumination, the gray is going to have even stronger impact. As you can see, it blends so well in a flower friendly palette. You'll find more creative inspiration at our website flower school .com. If you have questions, you can reach us through there, or pick up the telephone and give us a call at 503-223-8089. Now it's your turn, what are you going to create including that beautiful Ultimate Gray Pantone color of the year? Be sure to take a picture, post it on social media and hashtag Floral Design Institute, that way we all can see what you do as you do something you love.


