Spring Botanical Floral Design
One of the great joys of being a floral designer is that we can move ahead of the seasons. It may be the middle of winter, but that doesn’t stop us from creating beautiful springtime arrangements. In this video Leanne demonstrates the basics of creating botanical styled designs as she creates a sensational springtime arrangement filled with spring bulb flowers. Enjoy!
Video Transcription
Welcome to the Flower School.com video library. I'm Leanne Kesler, director of the Floral Design Institute, and today, in the middle of winter, I'm here to talk to you about spring. When I think about the springtime, I think about bulb flowers, blooming branches as things are just starting to peek up through the ground. Now, because we're florists, we're can get a head start.
So I have some iris and some tulips, blooming and beautiful, and then magnolia, starting to bud. It's not open yet, but the promise of spring is there. Then one more thing: hyacinth. Love their fragrance. I purchased plants and then totally removed them from the soil so that I get the lovely roots, the bulb, and then the flower to come.
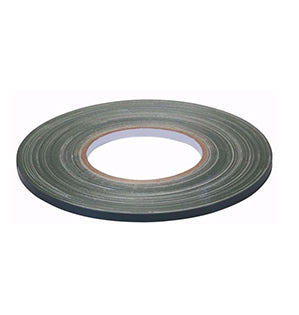
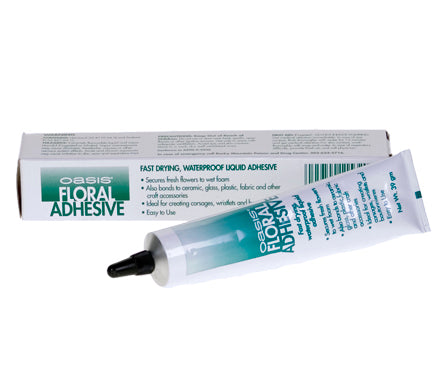
The container, a simple ceramic square, filled with foam, soaked with flower food, anchored in place with waterproof tape. Then to prepare the bowl, start by totally washing the soil off. I did that off camera. You don't need to watch me do that. And then be sure to dump that outside. Don't put it down your drain, because it will plug. Then to anchor these in place, using wood picks. I'm using the four-inch size, placing it right into the base, and it takes at least two to really be secure. Then, to make sure that those don't come loose, using your Oasis floral adhesive, just a dab on the insertion point, and then set them aside to dry.
The magnolia branches are fabulous for framing the design. So, starting with the branches and whittling them so that they'll go into the foam well and continue to drink, then placing it down at an angle, getting it securely in there, coming back with another, angling through, and yet another. It's a little long, maybe breaking it down, then whittling it, coming in. You could frame it all the way around or just three quarters. Really up to you.
Then coming back with the bulbs. Now, they have wires on them. You can cut them off or leave them. They aren't going to show. It really just depends on your timing. Placing that right down into the foam, anchoring it, and letting the roots come out over the side, making sure to fill it in from the back side as well. You want it to be all the way around, not flat. Then bringing up the bulbs more towards the center, adding some dimension and thinking about framing where you can add your fresh cuts.
As I placed everything in the foam, I left the center bare so all of this section right in here is available for my flowers. And as I looked at it, I thought, "Oh, I need a little more over here." So going back, adding another magnolia branch, turning it so it fits in with the first set, making it appear that it's growing from the same stem, then coming back. I've got some beautiful iris. Letting them be tall, coming up through the center, grouping them like they would grow. So notice it's not straight up and down, letting it have its own little personality. Reaching in, feeding it through.
And then, when you think about flowers as they grow, the bud is lower than the full-blown flowers, so tucking this down as though it was growing in nature. It would be a little bit shorter, and then as it opens it'll fill in that area. Maybe bringing one more, little more towards the back. And it's even tighter, so keeping it really short, maybe even very, very, very short. Tuck that way down in there so it's almost peeking out.
And then the tulips. Don't want quite so many leaves. Adding that in, picking up the direct compliment of the color of the iris and then grouping a few more of those in place as well.
To finish, adding just a tiny bit of foliage. I'm going to use Galax, making sure that the spots of tape are totally concealed and adding a little element of green in there. Bring it around towards the back, filling in. And then, if your garden is like mine, the weeds start to come up, so I added just a touch of Monte Casino. Very delicate, very short, almost like it's the weeds growing in the garden. And the added bonus? It adds a touch of white, which brightens the overall design. Just adding it in here and there, and then as I work, turning it, double-checking the sides and the back, again making sure to conceal the tape, and filling in, hiding all of the mechanics.
The beauty of this design is that it's very long-lasting, even with short-lasting blooms, and it becomes interactive. The taller iris, they'll fade first. They can pull them out. The tulips are going to continue to grow, so they'll be a little taller. Then those will fade. They can pull them out. Then the buds of the iris are going to bloom out. They can pull those out, and even then it'll be super beautiful because the hyacinths will have been growing up. And so these happen to be purple, and that will fill in with the color. The magnolia may bloom, and the Monte Casino will just stay there looking like weeds, but pretty fabulous weeds. So you can see this design becomes one that the customer goes, "Oh, wow! Look what it's doing now! Oh, my! Look at this!" And yes, the bulbs will last and last and last, even though they're just hanging here out of the water, 'cause all the nutrients are inside.
For more creative inspiration, check out the website, Flower School.com. The website contains hundreds of floral design how-to videos, floral design classes, online floral classes and DIY Flowers.
If you have questions, you can reach me there or my telephone at 503-223-8089. And of course, I'd love to see what you create. Take a picture, send it to my email, leanne@floraldesigninstitute.com. Or better yet, post it on social media, tag #FloralDesignInstitute, and that way we all can see. Now it's your turn. Happy dreaming of springtime, and do something you love.


