
Tropical Bridal Bouquet
The use of tropical flowers, plants and foliages in wedding design is on-trend and rapidly growing in popularity. A great place to explore new tropical plants and flowers is the annual Tropical Plant International Exposition. In this video clip Leanne creates a beautiful bespoke garden styled bridal bouquet using a chicken wire armature. Leanne carefully demonstrates the various techniques necessary for keeping the bouquet light, functional and dramatic. Enjoy!

Video Transcription
Welcome to the Flower School.com video library. I'm Leanne Kesler, Director of the Floral Design Institute, and today I'm excited to share with you big news about the Tropical Plant International Expo coming up in January, the 17th to the 19th, in Fort Lauderdale, Florida. Where better to be in January than sunny Florida? It is an event that showcases the latest trends in foliages, florals and tropicals. As you can see, there's a lot that will be there. You can find out all the information on the website at tpie.org.
Today I'll be making a fabulous bridal bouquet using our vast array of materials that you might see when you visit the TPIE this January, because they'll have plants, like this palm that I gathered, and succulents, Tillandsia, on trend, and then they'll have cut flowers as well, topicals like the ginger, the cymbidium, and you might see interesting foliages like ruscus, lily grass, plumosa, seeded eucalyptus. Then I also threw in some brunia, some garden roses, spray roses, one of my favorite foliages, fatsia aralia, and some tea leaves. Lots of fun things to work with. Let's get started.
As you walk through the show, there's almost 400 vendors. You'll find so many different plants, and what I find when I'm working, many of the plants that you might keep on hand on your flower shop, can be cut down and used as foliages. Going through, and this palm is just perfect, would work well for the bridal bouquet.
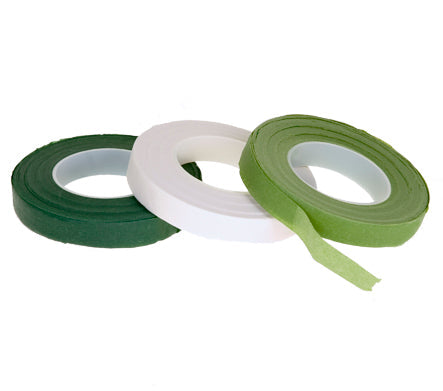
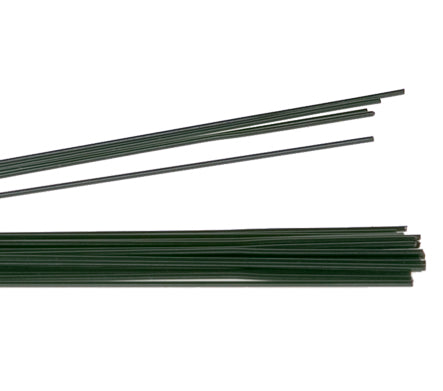
Then, as you're working, you'll notice that many times the tropicals, the stems are so large, and the flower itself heavy, or the succulent, just on a little plant. So learning the mechanics of bridal bouquets with this fabulous flowers. Key is to cut them down. Go ahead and remove that stem, and then wire it. You can pierce right through using an 18-gauge wire, getting it forced through and down, and then tape it, adding an artificial stem. And when you do that, you're reducing the bulk and the weight so those fabulous bespoke bridal bouquets that we see, where we think, "How heavy could that possibly be?" If it's done correctly, it's not heavy at all.
So you would go through, just wire and tape, and do this with all your materials, giving them an artificial stem, but think about which things are needing water and which things do not. I wouldn't wire my roses, but I would the ginger, and I would the Tillandsia, the brunia and the succulents, all of them with artificial stems, ready for designing.
Once you have all your flowers and foliages prepared, fully hydrated, wired and taped, then you need to prepare your base mechanics, and another technique for reducing weight, reducing bulk, is to use the floral netting, just cutting a small piece, approximately six by six. It depends on how large you want your bouquet to be. Then mold that into an armature connecting the ends so that you're ready to design with the floral netting armature. Chicken wire is the common terminology.
To support the flowers, you want to build a nest of foliage first. So the ruscus, just weaving through, and another. And your hand hold at the base and this becomes the handle of the bouquet. Maybe a little plumosa. Gives you the ability to come out sideways, getting a little more fullness, pulling it through on the opposite side. Maybe even a little bit to the front. And that beautiful palm that I cut. And you don't need to worry about the bottom and covering that right now. At the end, you'll go back and make sure that all your mechanics are concealed so that the chicken wire can't show at all.
Now I can start adding in my flowers. Maybe some garden roses first. They're so gorgeous, setting them down in. Tucking some low, leaving some a little more extended. Adjusting their leaves so that they all fit together. Just twisting. Now I have removed all the thorns already, so I don't have to wrestle with that. So if you're wondering, "What about those thorns?" They've been removed. I did that when I was processing the flowers to make sure they'd last the longest. Beautiful deep red spray roses to add intensity of color, making sure to fill in a bit to the back as well. Now the back is a little flatter because you don't want it to run into the bridal gown, but you don't want it to be totally flat either, so you just tuck things in here and there, and then thinking about gorgeous cymbidium, trying to determine where it will best fit, and I'm thinking right about here, peeking up over the top of the other blooms.
The base is beautiful. Now I can go back and add my wired blossoms, and since their stems are so strong and straight, it's very easy to just slide them down in, nestling them in, adjusting the cymbidium, maybe pulling up just a little bit to allow extra room, and then setting him in there, adjusting the fronds, so it settles almost horizontal, pulling your eye back in the design and coming back with the ginger, feeding it through the weave, finding the perfect little hole, and then letting it drape, giving you movement, pulling your eye through on an asymmetrical angle.
And the second one, and keeping through group so it adds extra visual value, pulling it from the back, finding the perfect little hole for it. Try again with a little different placement. It didn't want to go in there. There we go. And then angling it. And that's the beauty of the wire. You can adjust the placement exactly where you want it, and ginger holds so well. It's not going to have any shortening of the life. You can adjust the foliage around and come back with the brunia, adding that gray, a softening, and the texture, and then coming back with succulents, determining where it needs to go to add maximum value. And then also bringing some towards the back so that you're not one-sided. You want to be beautiful whichever way they see it.
The last touches. Take a look at your bouquet in the mirror. See what it looks like front on. Then make adjustments. Maybe you want this little succulent moved forward, and it's on a wire, so you can bend him. Maybe a little bit of seated eucalyptus coming up towards the top with the cymbidium so it's not lonely by itself up here. And then adding one more succulent, feeding it in, and then once again, looking in the mirror, double checking that everything's right where you want it.
Once it's beautiful from all sides, that's when you worry about the back, totally covering over all of the floral netting to make sure it can't show, and the fatsia aralia is perfect for that. It has such nice, big leaves, very sturdy, and you can just slide them in underneath, even terracing them. Do a couple at the same time. And the tea leaves as well are lovely and bring in that deep red color so just tucking that in there, and then when everything is secure and concealed, go back with raffia. Hold it with one finger, and then hold upside down and lash above your hand, going around two to three times, and then knot it securely to hold everything in place.
The finished bouquet. Cut the stems down, and then you can just set it in a vessel of water where it can wait. You can do this two or three days ahead without any problem. Then, the day of the wedding, take it out. Add the ribbon, and you're ready to go.
Mark your calendars now. January 17 to 19 in Fort Lauderdale. There's going to be so many design workshops. You'll see how to work with all the cool new products. They have interior scapes, and then, like I said, almost 400 exhibitors showing off the great florals, foliages and tropicals. My friends from AIFD will be there doing demonstrations. There'll be so much to see. You can find all the information on their website, so go ahead. Check it out. It's tpie.org.
Now, for more creative inspiration and education, check out our website, Flower Shool.com. The website contains hundreds of floral design how-to videos, floral design classes, online floral classes and DIY Flowers.
You got questions? You can reach me through there or by email or by telephone, 503-223-8089 and Leanne@floraldesigninstitute.com, and I'd love for you to gather up some fabulous foliages and florals and create a bouquet. Take a picture. Post it on social media, and tag #FloralDesignInstitute so we all can see, because now, you know the mechanics, and it's your turn. Have fun and do something you love.


