Wedding Compote Centerpiece
On trend for wedding receptions is a vintage styled centerpiece crafted in a compote vessel. In this how-to video Leanne gathers a luscious selection of flowers and foliages beginning with the Amnesia Rose, silvered foliages, Queen Anne’s Lace in soft pink and burgundy. Egg plant colored Scabiosa and angel wing begonia finishes the luxurious look of this vintage design. Enjoy!
Welcome to the Flower School.com video library. I'm Leanne Kesler, director of the Floral Design Institute, and today I get to share with you a fabulous wedding compote centerpiece.
Starting with a beautiful mercury glass compote and then gathering flowers that'll give it a vintage look, the emphasis on the amnesia rose, such a complex color, so fabulous, and quickly makes it look vintage, almost antique. Then mixing that with silvered foliages, seeded eucalyptus, some rich greens to set it all off, and then one of my new, fabulous finds ... Look at this Queen Anne's lace. Soft pinks even into the burgundies. Such great color. And then scabiosa in eggplant will give this a luxurious look.
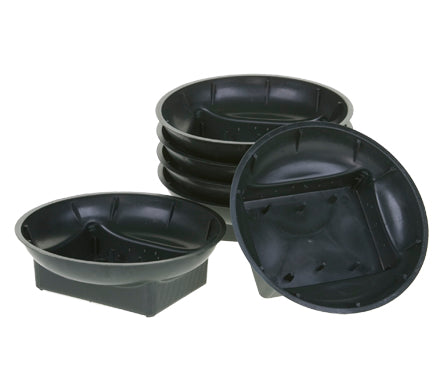
For wedding specialists, oftentimes the mercury glass is a rental piece, so to make sure that you don't have messy cleanup, I would use a gripper bowl foamed in, and then just set that in. That way you don't have tape and muss on the compote itself. Then just score your corners and begin designing. Maybe start with a little bit of the ruscus letting it extend outward.
Maybe fatsia leaves so you get a nice large leaf coming in here. Going back, coming out the opposite side. Going long and low. Then of course, we've got the gray foliage, which is so fabulous, tucking it in, and letting the seeded eucalyptus drape over, giving it soft movement, and then continuing on, filling in until all your mechanics are concealed.
You can see, even with just the foliages, it's beautiful, working with a horizontal line, focusing on a radial format, and drawing the eye in toward the accent area.
So now I go back with flowers and think about my sequencing so that the littler ones are on the tip. Now some of the amnesia might have a bad petal or two, but I try not to pull off very many because that's part of that beautiful vintage look. Then judging my length, giving it a cut, making sure I get at least two inches inserted into the foam coming out to the sides, and then repeating on the opposite side. Again, choosing one of the smaller blooms, judging the length so that they coordinate giving me a symmetrical oval, and placing it in, again getting that two inches.
Then the larger blooms, that are starting to open, those are going to go more toward the center, the main body of the design, and then as the roses open and evolve, you notice the color will change so it becomes much more lavender. That again is part of this rose's beauty. It's so amazing.
So maybe tucking it down below creating depth, a little bit shorter than the first one, drawing the eye in, and then of course, a centerpiece is two-sided, so bring into the opposite side, and then as you work, drawing out from the center to the sides, back and forth, filling it in completely in the oval form.
To finish the design, the fabulous texture of the Queen Anne's lace, giving it a cut, and then feeding it in. Bring it out to the sides as well as the center and the back. Again, getting that two-inch insertion, and the scabiosa, it's so beautiful and very thirsty, so you want to make sure that you get it in at least two inches so it's nice and deep so it can drink well, and then clustering them so they get good value together, letting them come up a little bit higher, facing them both directions, some towards the front, some towards the back, so it's all the way around. There really isn't a front and a back. Just filling it in till you get it nice and luxurious and beautiful.
You could stop here, and it is truly lovely, but sometimes, the mark of the professional is going just that little extra step, and for this, my final detail is a touch of angel-wing begonia. The colors coordinate so well, and it works fabulous as a cut foliage. Just cut it from the plant, and then insert it deeply into the foam, and it adds that accent that makes it extra special.
As you're working on a centerpiece, it's important to work front to back all the time so that you don't end up one-sided with a front and a back. You want it to be all the way around, and in fact, some designers work with a turn table. That way, as they're working, they can turn it easily and see it from all angles and be sure that it truly is a fully-symmetrical centerpiece.
Now, for more creative inspiration, check out the website Flower School.com. The website contains hundreds of floral design how-to videos, floral design classes, online floral classes and DIY Flowers.
If you've got questions, you can reach me there or by telephone at 503-223-8089. Of course could you always use my personal email, Leanne@FloralDesignInstitute.com because now, it's your turn. What are you going to create? Take a photo, send it to me or post it on social media and tag #FloralDesignInstitute so we all can see. Have fun and do something you love.


