
Wedding Dog Collar
Wedding-ready and absolutely adorable—Oscar is stealing the show! Learn how to create a custom floral dog collar perfect for weddings, events, or photo shoots. This fun design adds a personal, memorable touch and is easier than you think.

Video Transcription
Oscar joined us in the studio today. Oh my goodness. Having animals in your wedding is so popular. Creating a collar, how grand. Make sure it's not poisonous. Let me show you how it's done.
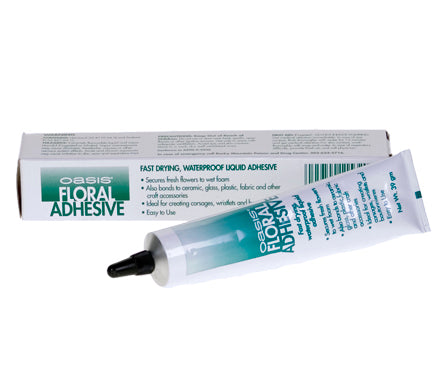
When you begin, take the easy way out and find the perfect dog collar. They come in different sizes so you want to make sure it's the right size and preset it. Measure it on the dog that when you know that it's shut, it's the right size because once you design it, this is what you have. So start with a dog collar, pre-measured and then Oasis Floral Adhesive, your favorite flowers, and you're ready to go.
As you begin, the easiest way is to start with a base of Oasis Floral Adhesive and just put that onto the collar and let it start to dry. Then go back and pick a base flower. For me, it's these beautiful spray mums, clipping them down. They're so gorgeous in that coloration, fabulous. Then once you have that, just a bit of glue onto each, let it sit because the glue adheres better once it has had a little bit of time to begin drying. So just a bit, and then go back, and since you have glue to glue, it will adhere so perfectly. Just setting it in, going down and creating the base. Now I go through and set everything on and then once it's set, go back and push. Give a little bit of pressure, making sure that it's going to stay perfectly and then repeat, going on down through the rest of the collar.
Once you have your base flowers in place, go back and add accenting flowers. Matsumoto asters are perfect, just cutting them down and then taking a moment, gluing the back, letting it sit for a moment. Then when you're ready, go back and add them in. Adding a little more interest color wise, that contrast and texture. Then thinking about what other blooms would be perfect. Muscari adds that beautiful soft blue, just a bit so it expands that analogous color harmony, adding more beauty, texture and color variation.
You can stop at any point with the floral tapestry, but maybe you want to do a little more. Adding an emphasis, miniature cymbids are beautiful. The cymbidiums hold so well, and maybe taking the color even a tad bit further to that royal blue to finish off the analogous color harmony, tucking that in. So pick your spot and then add right down in, giving it a little bit of pressure because that will hold everything in place and coming in with the opposite side and then again, adding in a bit of pressure. And then if you've been in basic floral design, you know orchids like to be social creatures. So placing them so that their throats are looking towards each other so that they can converse and then coming back, maybe to the bachelor buttons, cornflowers, tucked in to bring that darker blue, to add a little bit more interest as you work along.
The recipe, remember the mechanics were all based on a dog collar. Then the flowers, I used two stems cut apart, of the Spray Mums, two stems of the Matsumoto Asters to get that deeper purple. Then three stems of the Bachelor Button, Cornflower for that beautiful blue and five stems of Muscari for that lighter blue. Then for the final accent, two stems of the Miniature Cymbidiums.
When you're working with flowers and animals, you want to think about the poisonous qualities. Be sure to check on all of those as to which flowers you can use to make sure it's safe. You want more creative inspiration? Check out the website, FlowerSchool.com. If you have questions, you can reach us through there, but for now it's your turn. Find your perfect puppy. Create flowers. Take a picture and post it on social media. That way we all can see what you do as you do something you love with your furry friend.