
Wedding Wrist Corsage
The wrist corsage is the current on-trend body flower for weddings. The fresh flower wrist corsage is comfortable to wear and allows for more freedom of movement. In this video how-to demonstration Leanne demonstrates a beautiful easy to create wrist corsage using a Slap Bracelet and Floral Adhesive from the Oasis Floral Products company. You will love the techniques demonstrated in this video. Enjoy!

Welcome to the Flower School.Com video library. I'm Leanne Kesler, Director of the Floral Design Institute. Today, I want to share with you a wedding wrist corsage. It's so on trend. More and more brides are choosing to do wrist corsages over a pin on. There're easy once you know the professional tricks.
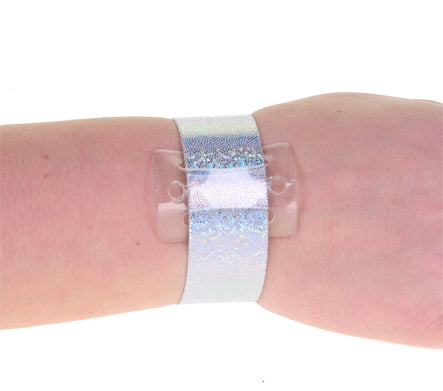
In addition to your favorite flowers and foliages, I like to use the slap bracelet from the Oasis company. It's a wonderful way to make a wristlet, has a little tab that you glue on to. Then it's easy to slap on to the wrist and fits snugly, no matter whether it's a large wrist or a small wrist. To make it a little more personalized, I paint it using the Design Master Just For Flowers but it works well for the slap bracelet. You can see that I started with the white and moved it on into the yellow, which is perfect. Then to adhere every thing together, the Oasis Floral Adhesive Cold Glue is the absolute best.
To begin, I like to start with a bit of ribbon. Double sided satin is nice. Make a small bow. Right now, it's on trend for small wrist corsages, very delicate, so you certainly don't want a large bow. Just maybe three loops on each side. Very petite. Then tie that off with a wire, nice and snug, fluffing the loops so it's a rounded bow. Then clipping that wire off in the back because you don't really need that. Bending the wire so they don't poke anyone. Then this is where you use your Oasis Floral Adhesive. It works best if you do glue to glue. So I take the lid off, put a little glue on the base of the corsage. Just a bit, you don't want it to be too heavy, then I also take a little bit of glue and put it on to the tab and then set that aside so it begins to dry. When it gets a little bubbly, that's when it's going to be the most secure. You want to just let everything sit for a bit.
Think about your foliages. Maybe a little bit or Oregonia. This variegated color is fabulous. Breaking off bits and putting a dab of glue. Then again, setting it aside. So you let everything begin to set before you do your gluing. Then tucking it on, pressing firmly to get it to lock in. Going back, adding the bits of foliage, making sure that the whole tab is covered because you don't want that plastic to show. The green and the yellow is beautiful together. Then I like to go back and add additional foliages. Maybe a Camilla leaf. Maybe a little bit of juniper to give a nice textural base to support the flowers.
When prepping for a wedding, it's vitally important to be able to prepare in advance so that you don't get rushed at the last minute. This portion you can do far ahead of time. Put it in a plastic bag or a box and set it in the cooler. It will easily last a week or more. Then when it gets closer to time to the wedding, you take it out and add in your blooms. For this, I'm going to use the little miniature Phalaenopsis and also a bit of succulent. With the succulent I can just cut it down, use just a potion. Then again, placing the glue right on the back and letting it sit for a minute. It waits for me because it needs to set to dry. Taking the Phalaenopsis, finding a perfect bloom and then just a small amount right on the base. The beauty of a Phalaenopsis is you can touch it and it doesn't brown. It doesn't hurt the petals.
Allow that began to dry. Now the only glue that will work for this is the Oasis Floral Adhesive. It does not expand or contract when it gets cold, so you can put it in your flower cooler without having it weaken. If you're worried about it, I challenge you. Make yourself a wrist corsage and wear it all day long. You'll be surprised at just how sturdy it is. I just tuck this in. Go back, add my blooms and then add additional, if I would like.
To add a special touch, a little bit of sparkle, Diamonte pins are fabulous. They come in a variety of colors. I'm using the clear and just cutting down the pin. It's a little longer than I need. Then a tiny bit of glue on to the pin. You can just tack it right into your tube. Then pinning it into the corsage, tucking it down in. Maybe a second one, creating some depth. Just the two add a touch of sparkle that makes everything shine.
Wedding wristlet corsages using the Oasis Floral Adhesive. So fast. So easy. So fabulous. Now if you've taken classes with me before, you know there's one more tip. Before you put your lid back on to your Oasis Floral Adhesive, put a little bit of petroleum jelly or Vaseline right on the nozzle. That way when you screw it on, you can take it back off next time. It doesn't glue itself shut. That's the magic of going to Flower School. You learn little tips. For more creative inspiration, check out the website. FlowerSchool.Com. The website contains hundreds of floral design how-to videos, floral design classes, online floral classes and DIY Flowers.
If you'd like to contact us, you can reach us there or by telephone. 503-223-8089. Of course, I love to see what you create. You can send it to my personal email. Leanne@FloralDesignInstitute.com or post it on social media at tag Floral Design Institute, #FLORALDESIGNINSTITUTE so we all can see. Now it's your turn. Have fun and do something you love.


