Winter Wedding Bouquet
Garden roses and textural accents are on-trend for winter weddings. Beginning with luxurious garden roses from GardenRosesDirect (You’ll love the Golden Mustard variety!) Leanne added beautiful accent blooms from Florabundance (check out the gorgeous peonies!) This armature based hand-tie bouquet is sure to be a favorite!
Video Transcription
Welcome to the Flower School .com video library. I'm Leanne Kesler, director of the Floral Design Institute, and today I'm here to share with you a fabulous bouquet, perfect for a winter wedding. In the winter, even in the deepest winter, there are so many fabulous flowers. Today, I have things from gardenrosesdirect.com and also from florabundance.com. We'll be using so many gorgeous garden roses, varieties like Wanted, Piano, Princess Maya, then great, foliages textures, so many things all available in the winter.
The base mechanics, floral netting. I start with a piece. I cut it about six inches by 10 inches. You can adjust depending on how big you want the bouquet to end up, then just roll it into an armature and secure it so that you have a nice little armature that will hold everything right in place, right where you want it.
If you've taken classes with us here at the Floral Design Institute, you know we like to use a lot of foliage, and at Florabundance, they have a whole spectrum you can choose from. My general rule of thumb, a minimum of three varieties. So, I have some eucalyptus, some fatsia, and some Italian Ruscus. That will get me started. I can always add more later. With the armature in place, start by feeding them through, and what you're doing is beginning a handle and building it out to the sides. You can repeat that creating layers.
It's still coming out so that you'll have a handle. Coming back out the opposite side, feeding it, and then thinking about the other varieties, maybe a bit of the eucalyptus. You can pull it. You can see how it starts draping, everything locked into place. Some things it's totally fine to just place it underneath. It doesn't have to feed through as long as it ends up at that same handle location, coming back around. The fatsia I'm going to save till the end, using it underneath to help hide all the mechanics.
With the base, the next step is to establish the form, bringing the roses in letting them come across elongated into the same handle. This variety is called Wanted. It's a nice, beautiful round head, high petal count, maybe bringing some on the opposite side. When I use one color in the reds, I like to mix it with yet another just for a little variation. So, once I get the Wanted started, I can come back with the Piano, which is so wonderful.
It always has these little buds and a little bit different red hue, together pretty fabulous. And you can see pulling up from side to side, starting that oval form, don't wanted to stick with just the red. The red is so grand for a winter wedding, but I'm seeing a lot trending with red and white together. So, bringing in the Princess Maya, but the red and the white can be a little bit harsh if you polka dot it around, so grouping the Princess Maya a little closer to the center.
Then, of course, remembering the person holding the bouquet, you want some things coming towards the back just a little bit to fill in so that it looks beautiful from this direction looking down as well as this direction from the front. Then to help blend the Wanted, the Piano, the Princess Maya coming, in with a fabulous golden mustard, adding just a little more neutral hue to help blend the two colors, feeding it in, down, tuck it sometimes even just a little bit lower. Then going back and filling in with a few more until you have the perfect oval form.
With all the gorgeous roses, you could finish it off here, but one of the joys of working with Florabundance is that you can get most any flower, anytime of the year. They source worldwide, so even in the winter I can add a focal emphasis with a peony tucking it in, maybe doing two to group, adding a little bit more drama, and then enhancing with textures, turning them, getting them positioned, maybe a little bit of berzilia and the soft gray tucking it in. Bringing in some eryngium in this light blue. You can see how the colors blend so well, and the textures are wonderful.
To finish, adjust your blooms, look in a mirror, make sure you've got it exactly where you want. Then go back and add your last bits, maybe the fatsia leaves, and I pulled some lily grass just to give it some nice softness. Tucking it in, repeating, just giving it a little bit of movement, and you can curl those, drape them, then adding the fatsia.
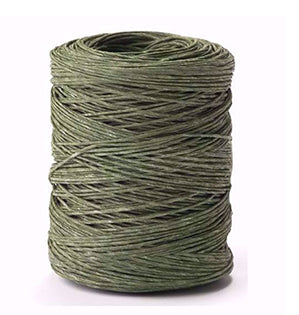
This will help cover the very last mechanics and add yet that little more different shape, another foliage, make it extra special. Then when everything's secure, right where you want it, go back using bind wire or raffia or zip tie. I like the bind wire myself. Cut it off and then just wrap it securely. I go around three to four times and then twist before I cut.
When finished, cut the stems down. You don't want them to be too long. Then determine how you want to cover your mechanics, the binding. I could pick up on the lighter roses and do an ivory, double-sided satin, or I could go into the darker roses and the peonies with this wonderful burgundy. I love the richness of the burgundy, so I chose to do that, just taking a small strip and wrapping right around the neck. Not going to do a bow. Not going to do streamers.
Much more tailored, just wrapping tightly, and repeating, bring it around, overlapping. I like to add that little extra layer, and then when you're done, tuck it in on itself. You don't want any raw edges. Then using a boutonniere pin, just pin directly in. It won't come out the other side. You've got to make sure they're short enough that they don't do that. You don't want it to poke anyone, but that secures it right into place.
The recipe for this on-trend bouquet sourced from florabundance.com and gardenrosesdirect.com. The base, Florabundance. I had three of the silver dollar eucalyptus, three of the Italian Ruscus. Then I had seven of the lily grass and three fatsia. For texture, three eryngium, three berzillia. You can see I worked in threes quite a bit, then two of the peonies. Then from Garden Roses Direct grown at Alexandra farms, I have six of the Wanted roses, three Piano, five of the Princess Maya, and then four of the Golden Mustard combining the neutrals with the burgundies for a lot of beauty.
Working with the winter palette of basically red and white takes a little practice grouping your colors, adding in enough neutral, enough foliage to balance it out. You want to experiment with this, so gather some flowers and design a way. Now, if you want more creative inspiration, check out our website at flower school .com. If you have questions, you can reach us through there or pick up the telephone and call us at (503) 223-8089.
Now it's your turn. What are you going to create with winter flowers? It's the perfect time to expand your skills and be ready for all those upcoming weddings, as you have fun and do something you love.


