
A Labor Day Picnic
The summer is drawing to a close. Here in Portland, it has been one of the best summers ever – for a sun lover. There were lots and lots of hot, blue sky days. I almost (key word being almost) forgot the pain of last winter's snows. Hopefully, it will continue with a glorious Indian summer in September. Cross your fingers that the sunny warm days kick in for the Labor Day weekend and stick around for a few weeks. We need to finish the ripening of all the green tomatoes! You still have time to plan the perfect end of summer family picnic for the Labor Day weekend. And, to help you get in the spirit, we have put together a fun and easy centerpiece idea you and the kids can create together. Yes, get the kids gathered up and share the joy of flowers. You can never start training a flower lover too early. Of course, while you are busy with the kids creating the centerpieces, someone else will have to do the cooking. Now, that is a very good idea! Put someone else in the family in charge of food. You take care of the flowers and lickity split – you’ll have the perfect Labor Day Family Picnic. As for the green tomatoes…let’s hope you have enough that ripen for the picnic. Enjoy.
STEP ONE:
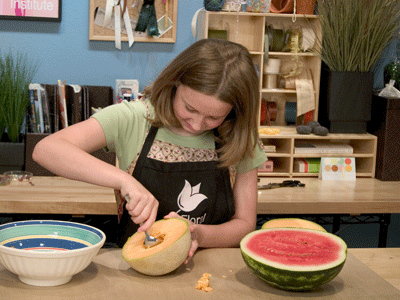
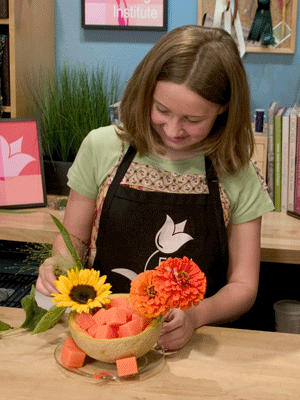
My family helper for this demonstration is Katie. My niece is proving to be quite creative, talented and smart – just like her favorite Aunt. She works every summer as our office intern helping with packing, sorting, cleaning, and organizing around the Creative Center.
Once the work is done, we play with flowers, visit the park fountain and hunt for the perfect dessert in local restaurants.
Katie and I visited the grocery and chose to work with cantaloupe and watermelon for our centerpieces. Begin by slicing the melons in half and scooping out the insides.
STEP TWO:
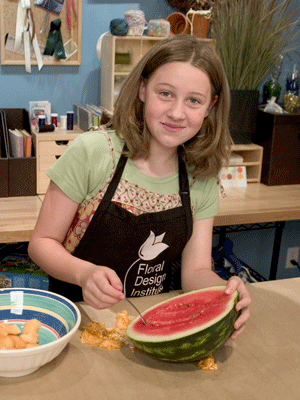
You can use any kind of melon – be sure to choose what you like best. As you scoop everything out, save the insides and eat them as you design. If you wanted to be really fancy, use a melon baller and create perfect little orbs to serve at the picnic. Not us – we just wanted the delicious fruit out of the way and into a bowl so we could eat it. Save it for later? No way!
STEP THREE:
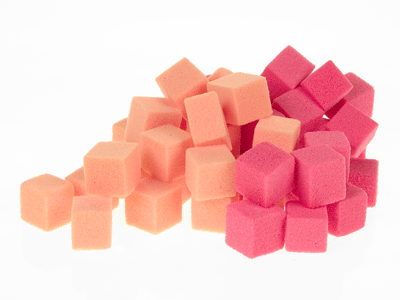
The magic of this design is the colorful cubes of Rainbow foam. The colors matched the melons and create the illusion of a fruit cube when placed into the hollowed out shell.
We used the "pumpkin" and the "cherry" colors but decided to call them cantaloupe and watermelon for this design – gee, do you think the Oasis Company could change their labels. I think our color names are far more appropriate. To work with the cubes, first saturate them with fresh water mixed with preservative. They soak just like regular green foam.
STEP FOUR:
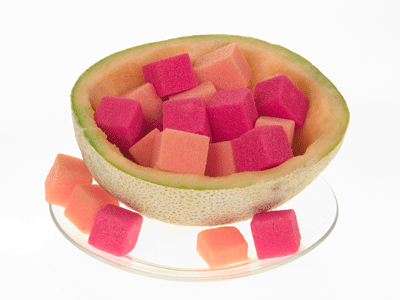
Place the hollow shell onto a plate. This will protect your table and also make transporting the finished design easier. Use a few cubes on the plate to wedge the shell upright and keep it from rocking back and forth. We mixed the colors in this shell. In later photos, you will see some filled with all one color. We could not decide which we liked the best, so did some of each.
At this point we decided we should have purchased a melon with green flesh so we could have incorporated the "lime" colored cubes as well. Guess we’ll save that brilliant idea for next time.
STEP FIVE:
This shell shows you the solid color cubes. Katie chose orange zinnias to match and then sunflowers for a contrast. Cut each stem short and tuck it directly into the foam cube. Short is the key word here. If everything is short – it is fun and easy. The cantaloupe shell will stay stable and the foam will not shift around. Longer stems take a bit more design technique – save that for another time when you are not working with the kids.
STEP SIX:
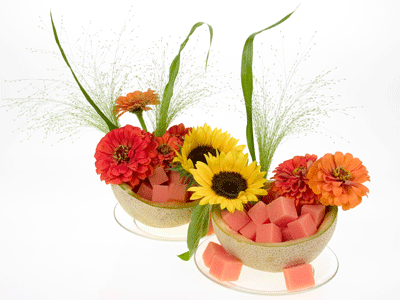
Our first two creations – what fun! Zinnias, sunflowers and fountain grass. The pair cluster together to create a beautiful centerpiece. If you have a long table, spread them apart or make some more!
STEP SEVEN:
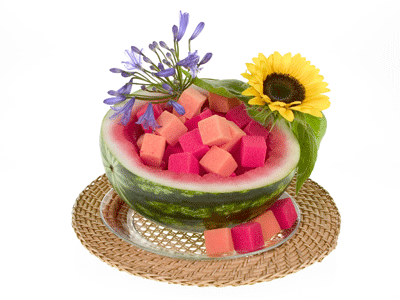
Here’s the beginning of the watermelon centerpiece. Again, set the shell on a plate and wedge it upright with a few cubes. We tucked some on the back side as well. Underneath it all, a rattan charger plate adds a bit of picnic fun.
Fill the center with the rainbow foam cubes and you are ready to design. Katie decided the blue agapanthus looked great with the bright colors and then added a sunflower to mimic the sun.
STEP EIGHT:
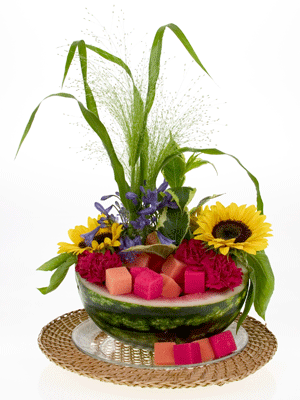
A couple more sunflowers, red miniature carnations, and fountain grass finish this design. Look close in the center and you will see a bit of weigelia as well. That was meant for my house but we could not resist chopping it up and adding it into the design.
STEP NINE:
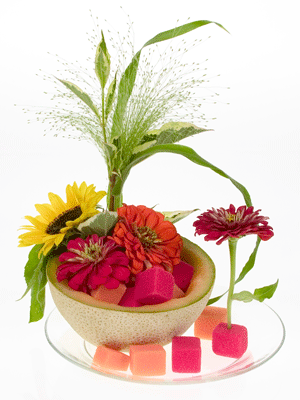
For the last cantaloupe half, Katie decided to use the larger plate and add single bloom supported by a rainbow foam cube. We decided it added just the perfect touch to the arrangement. For fun, a tiny sushi saucer with a single cube and a single flower could be set at each place setting. It sounded fun, we did not do it. Too much work! We figured the big picture is what mattered.
Fun and creative centerpieces marching down the table and lots of food – accent on lots! The individual place markers would surely get in the way of the corn on the cob and the baked beans and the hamburgers and the hotdogs and the tomatoes and the chips and the dip and the…you get the idea.
STEP TEN:
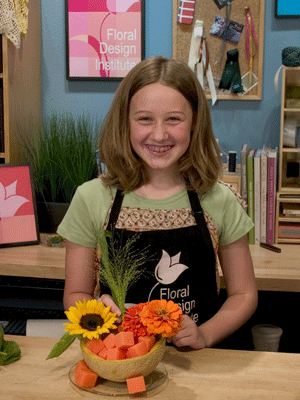
We completed the photo shoot just in time for lunch. That’s the really big smile. Putting all these centerpieces together worked up an appetite. Yes, we’ve been snacking on melon but peanut butter sure sounds good right now. Off to the kitchen we go to make sandwiches.
Now it’s your turn. Gather up the kids and the flowers and have fun. If you don’t have a kid to recruit, gather a few friends together. You’ll need melons, 5-7 flowers per centerpiece, rainbow foam cubes, floral preservative, plates to set the designs on and about 2 hours for fun. What are you waiting for? The hard part is convincing someone else to do the cooking.
Happy Labor Day to you and yours from Katie and me,
Leanne
Thank you for sharing these vibrant and fun floral designs with fruit and flowers. If you would like to lean more, join us in the Classroom or Online and study the theories and techniques of design with the Floral Design Institute Instructors.


