
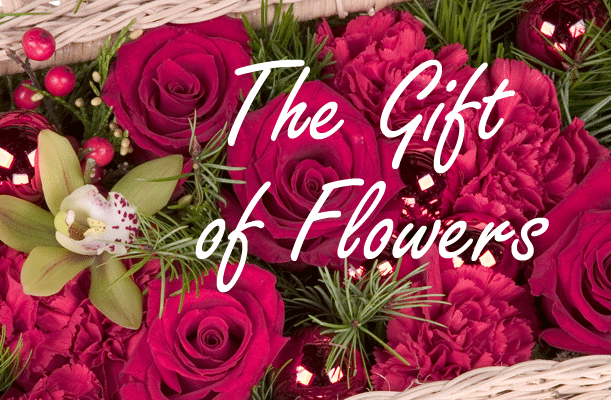
The Gift of Flowers
Party time! This season promises to be filled with parties and events every week. I’m not sure how I am going to fit in time for work and housekeeping! Christmas parties must take precedence. Everything else will just have to wait.
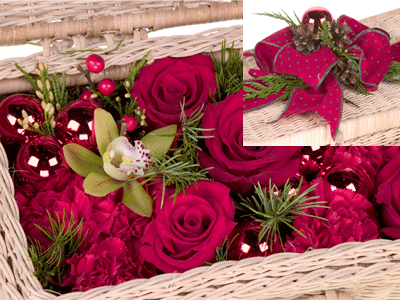
When attending a party I take flowers for the hosts. My favorite is the surprising Christmas Flower Basket. Check out the step-by-step demonstration on the following pages. I think you'll really enjoy this.

STEP ONE:
Start with a small, lidded basket. You can find this at an import or craft store. A lidded hatbox also works quite well. Open the lid and wrap a length of ribbon around the lid, tying the ribbon securely on the outside.
Be sure to leave extra long tails – at least 8” for the next step. Now you are ready to create a bow and tie it into place using those long ribbon tails.
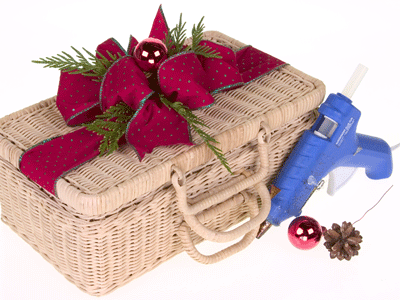
STEP TWO:
Using a hot glue gun, adorn the ribbon with bits of evergreen foliage (fresh or faux, both work well), a few pine cones and a Christmas ball or two. If you are not an accomplished bow maker, never fear! Every bow looks great once you glue in the Christmas accents.
The decorated lid is beautiful when it is finished. You could set it out and enjoy it just as is. I have an old decorated basket I made years ago I use to store my Christmas card paraphernalia.
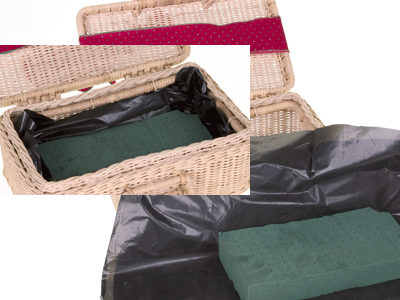
STEP THREE:
To prepare the interior for flowers, you will want a watertight liner. Of course, you can never find one that fits perfectly. The quick and easy solution is a heavy-duty garbage bag cut to size. The foam is a full brick cut in half lengthwise.
You want it deep enough to secure the stems but shallow enough that the lid can easily shut once you have all the flowers in place.
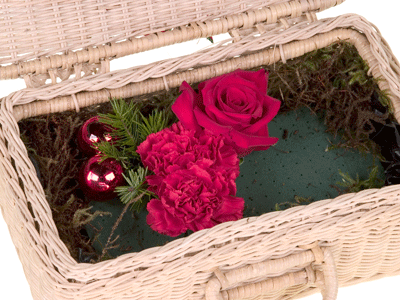
STEP FOUR:
Tuck a bit of moss around the edges to conceal your liner bag. Now the fun begins. Cut your flowers short – a 1-2” stem is plenty – and tuck them into the foam. As you place the blooms, think about line, texture, rhythm, and unity to create lovely tapestry of floral color.
STEP FIVE:
Don’t you just love it - what a surprise when the basket is opened. Recipients always smile and appreciate the thoughtfulness of such a unique gift.
My favorite materials for a Christmas basket are roses, carnations, berries, evergreens, and glass balls. A final touch of a single miniature cymbidium orchid provides a bit of contrasting color and excitement.
How many parties are you attending? Off to the store you go for enough baskets for everyone. Mix and match materials, colors, and ribbons for a unique look. Have fun and happy creating!
Thank you for sharing this festive holiday basket full of gorgeous flowers. If you would like to lean more, join us in the Classroom or Online and study the theories and techniques of design with the Floral Design Institute Instructors.


