Classic Wedding Corsage
Flowers to wear are on-trend and there is no single style or technique dominating the growing trend. It is important for the floral design professional to master the various styles and techniques of corsage making. In this video how-to Leanne demonstrates the classic wedding corsage done in a wire and tape technique. Enjoy!
Welcome to the Flower School .com video library. I'm Leanne Kesler, director of the Floral Design Institute. Today, I'm here to share with you a classic wedding corsage. Flowers to wear are back on trend, and knowing the right techniques makes it fun and easy.
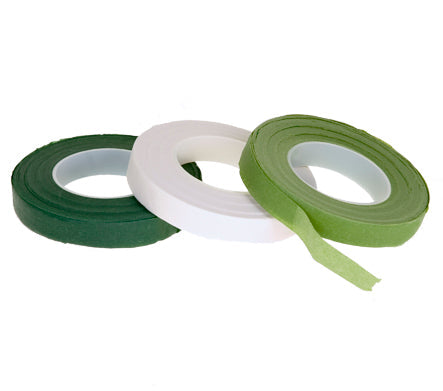
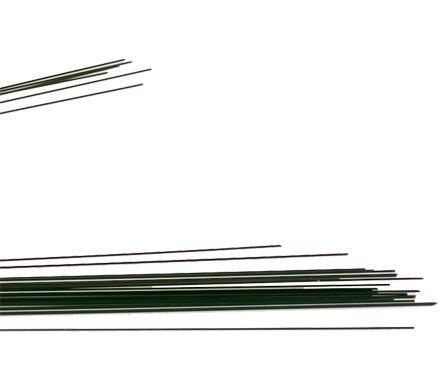
The mechanics will be the classic wire and tape. I have corsage tape in light green, number 26 gauge wire, so it's very delicate. Then I made a bow. If you need help with bows, you'll find them in the video resource library. We have several videos that you can see on bow tying. Flowers, some beautiful spray roses, a little bit of baby's breath. Yes, it's back in style. And some Israeli ruscus for the leaves.
As you prepare, you want to pick a variety of sizes of roses and clip them down with about a half inch stem. A few that are large, then a few that are very small, then in the middle. It's best to lay them out in a sequence style, you would have smallest, maybe another small, then a little larger, maybe medium between there, then down to the largest. Maybe you want two of the large. Laying them out, then going back with leaves, laying those also sequenced in there, so a leaf, leaf, leaf. Think about how many you might want. I've got one, two, three, four. Maybe one more, do an odd number of leaves. And then a little bit of baby's breath, key word being little bit. You don't want tons of baby's breath, just a smattering. Maybe some towards the top, some in the middle, and then the largest piece towards the bottom.
Before you try to do anything else, go through and wire and tape everything. When you do it in steps like this, it's the most efficient. Go through about one inch, bend it down, lay it out. Again, go through and do all your wiring, one inch and down. The leaves are a hairpin technique, so you bend it into a hook, so you've got that nice little U shape, then feed it over the main mid rib, and on down so you've got a little hook in the leaf. Once you have all of them wired, and I don't wire the baby's breath, so that's a little tip, go back and tape each one. So the prep on the classic corsage is your longest time. The assembly is very quick and easy. No need to tape to the bottom, just down a couple of inches on each item, making sure you leave the sepals, don't cut those off, because if you cut them off, the flower will fall apart.
Double check yourself when you have it all complete that you're still sequenced from smallest to largest, with a little bit of everything that you want to use. I made a larger bow, I'm going to want that down towards the base, and I made a smaller bow that I'm going to want up towards the top. And again, I lay it. That way you won't forget that, oh yes, I was supposed to add a little bit of baby's breath, or gee, I need another leaf, because it's all right in front of you. Then, you go ahead and start adding things together in your hand, picking the smallest, adding a leaf, taping those together, going down just a ways. Adding in another bloom and another leaf, and maybe the smallest bow, tucking it all again into your fingers, and then taping tightly. Now, once you get a few things, we have one, two, three, four, five wires. That's too many. Stop and clip them out so that you don't get too much weight. Stagger, you don't want them all to end at the same time. Leaving one long, and the rest a little shorter. There's the start of the corsage. Then go back, add in, just following what you put here. A little bit of baby's breath, another bloom, tape, and clip.
As I look at it, I think about how it will sit on the chest and then keep adding, making sure that it's very flat. You don't want it to protrude. Taping it in, maybe a tad bit more baby's breath, another leaf and another flower, taping down. Then again, you've got too many wires at this point, so clipping them out, just fanning it so you can get into them. Thinking about where you want that final bow and the final rose and the final bit of baby's breath and the final leaves, tucking them all in at once, then reaching in as high as you possibly can, taping it tightly, clipping, then taping all the way to the bottom.
To finish, take a look at the back-bone, it should be nice and clean and sturdy. This part shouldn't flop around. Then, using the tail, just curl it around, giving a little squiggle. Bend it just slightly, angling with a slight curve, so that when they pin it on it sits nicely on the chest. Two pins placed straight up the back. Don't let them come back out. That way, when they go to pick it up, they won't poke themselves.
The classic shoulder corsage is easy to do. The recipe, just one stem of ruscus, one stem of spray roses, a small bit of baby's breath, a little bit of ribbon, wire, and tape. 26 gauge wire is what I used. Now, this is one trend. You'll see many more on our website at Flower School .com. We have cuffs, we have with ribbon, without ribbon. Now you know the classic.
If you have questions about this wedding corsage tutorial, you can reach us through the website at Flower School .com or pick up the telephone and give us a call. The teachers are here to help, and I am as well. The number is (503) 223-8089. Now it's your turn. Get some wire, get some tape, make a classic corsage. Then take a picture and post it on social media. Be sure to hashtag Floral Design Institute so we all can see as you create something in the classic style and do something you love.


